Affiliate Disclosure:Home Vacuum Zone is reader-supported. When you buy through links on our site, we may earn an affiliate commission at no additional cost to you. This does not influence our reviews or recommendations — we only recommend products we genuinely believe in.
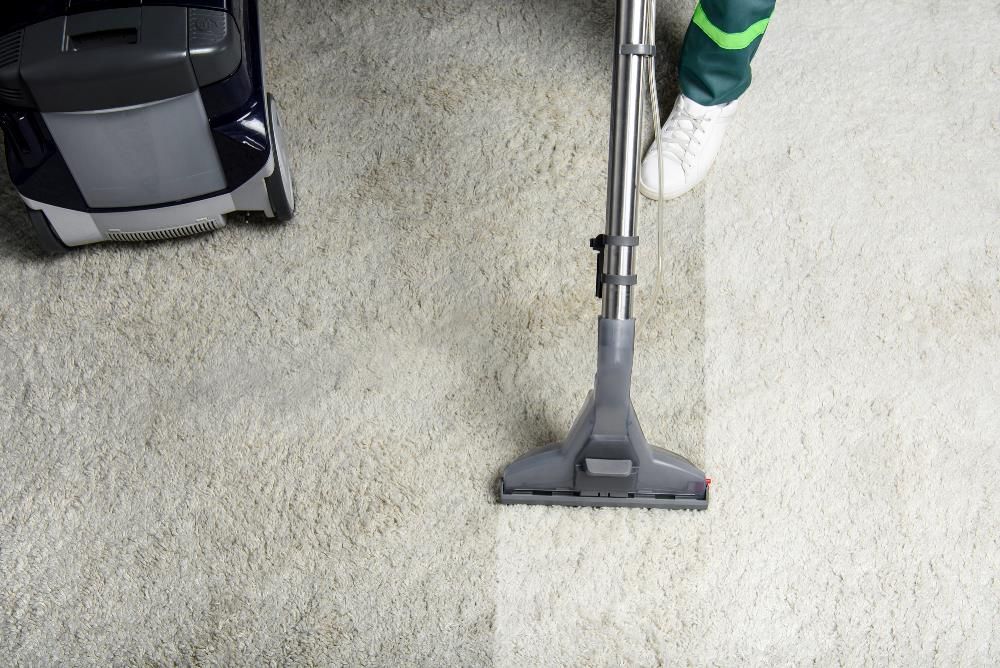
Hoover carpet cleaners are powerful machines capable of restoring carpets that look years past their prime. If you’re still deciding between Hoover and other brands, our Hoover vs Bissell carpet cleaners comparison is worth reading first. But like any tool, results depend on proper technique. Whether you’re using a Power Scrub, SteamVac, or SmartWash model, this guide covers everything from setup to troubleshooting.
Carpet cleaning isn’t complicated, but skipping steps or rushing the process leads to disappointing results - damp carpets, lingering odors, or worse, damage to your flooring. For different carpet types and their care requirements, see our dedicated guide. Follow this comprehensive guide for professional-quality results every time.
Before You Start: Preparation Checklist
Proper preparation prevents problems. Complete these steps before turning on your Hoover:
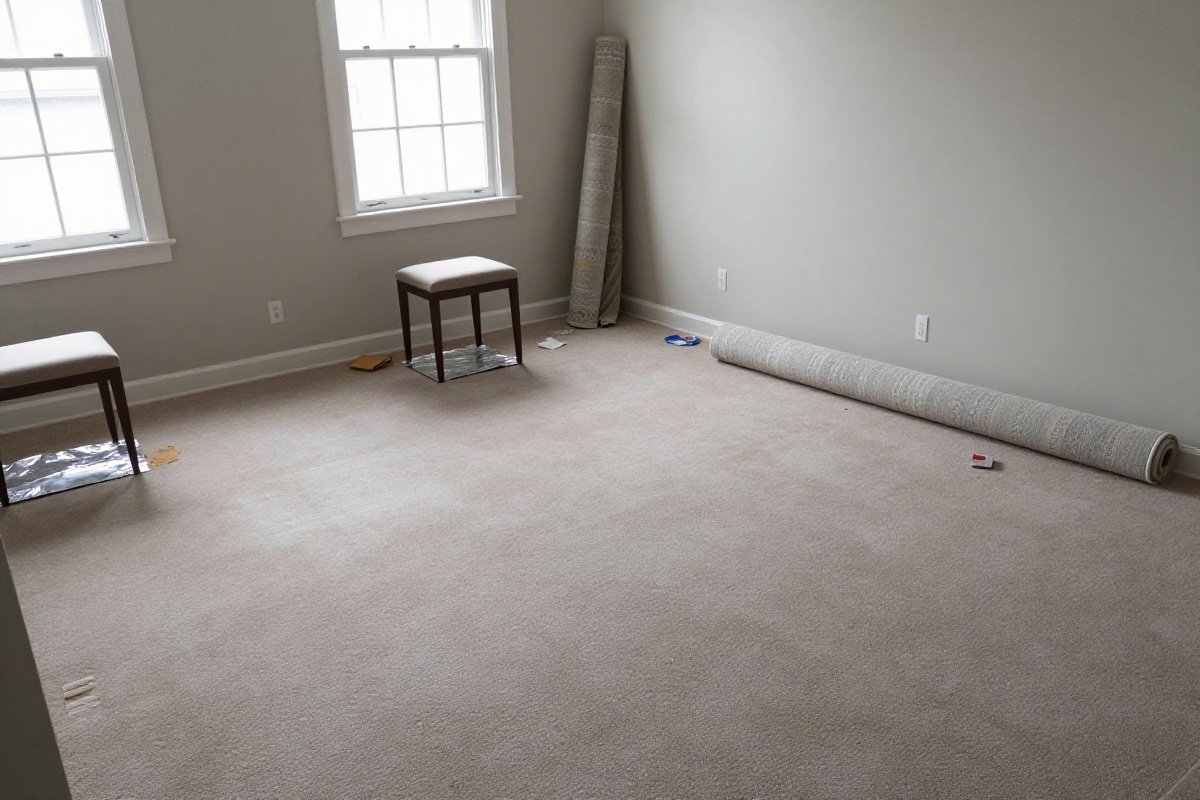
Clear the Room
Remove all furniture, toys, and objects from the carpeted area. If moving heavy furniture isn’t practical, place aluminum foil or plastic under legs to prevent staining from wood finishes or rust from metal.
For large rooms, consider cleaning in sections. Move furniture to one half of the room, clean that section, then shift everything to the cleaned area while you tackle the other half. This approach works particularly well for bedrooms and living rooms where you can’t completely empty the space.
Vacuum Thoroughly
Run your regular vacuum over the entire carpet first. Carpet cleaners are designed to wash, not to pick up loose dirt and debris. Pre-vacuuming prevents your Hoover’s dirty water tank from filling with dry soil. Need a great pre-clean vacuum? See our best vacuums for carpet roundup.
Make at least two passes in different directions. The first pass picks up surface debris, while the second catches dirt loosened by the initial vacuuming. Pay special attention to edges, corners, and under furniture skirts where dust accumulates. If you have pets, use a rubber rake or brush to loosen embedded pet hair before vacuuming - standard vacuums often miss hair trapped deep in carpet fibers.
Pre-Treat Stains
Apply carpet stain remover to visible spots 10-15 minutes before cleaning. This gives the treatment time to break down stains so the carpet cleaner can lift them effectively. Popular options include Hoover’s own pre-treatment spray or Folex Carpet Spot Remover.
For protein-based stains (blood, food, pet accidents), use an enzyme cleaner that specifically breaks down organic matter. For oil-based stains (grease, makeup), look for solvent-based pre-treatments. Tannin stains from coffee, tea, or wine respond well to acidic treatments. Always blot - never rub - pre-treated areas to avoid spreading the stain or damaging carpet fibers.
Test for Colorfastness
In an inconspicuous corner, test your cleaning solution on the carpet. Apply a small amount, wait 10 minutes, then blot with a white cloth. If color transfers, the carpet isn’t colorfast - adjust your cleaning approach or consult a professional.
This step is particularly critical for:
- Natural fiber carpets (wool, sisal, cotton)
- Carpets more than 10 years old
- Brightly colored or patterned carpets
- Area rugs with unknown fiber content
- Carpets that have faded unevenly in sunlight
If you discover colorfastness issues, you can still clean the carpet using cooler water and a more diluted solution. Test this adjusted mixture in another hidden spot before proceeding.
Understanding Your Water Quality
Water quality significantly impacts cleaning results but rarely gets discussed in basic guides.
Hard Water Considerations
If your home has hard water (high mineral content), you may notice:
- White residue on carpets after cleaning
- Reduced cleaning solution effectiveness
- Faster buildup in the machine’s internal components
- Carpets that resoil more quickly
Combat hard water by adding a water softener packet to your clean water tank or using distilled water for especially important cleaning jobs. For routine maintenance, descale your machine every 6 months by running a mixture of white vinegar and water through the system (consult your manual for specific ratios).
Soft Water Benefits
Soft water creates more foam and requires less detergent. If you have a water softener system, reduce your cleaning solution by about 25% from the recommended amount. Too much foam in soft water actually reduces cleaning effectiveness and makes rinsing more difficult.
Step-by-Step Instructions
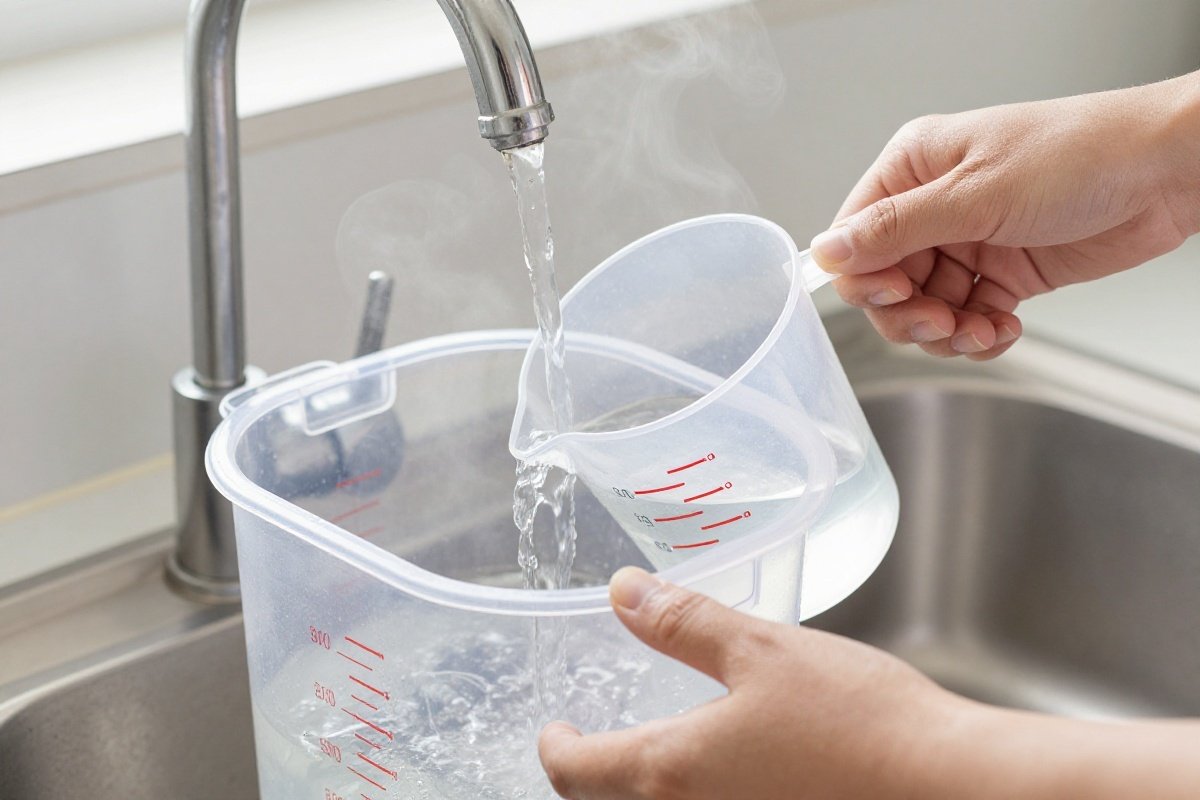
Step 1: Fill the Clean Water Tank
Locate the clean water tank (usually the larger, upper tank). Remove it from the machine and:
- Fill with hot tap water to the fill line (not boiling - extreme heat can damage plastic components)
- Add Hoover carpet cleaning solution according to the recommended ratio (typically 5 oz per gallon)
- Replace the tank cap securely
- Reinsert the tank into the machine
Pro Tip: For heavily soiled areas, you can use slightly more solution, but never exceed the maximum fill line. Too much detergent leaves residue that attracts dirt.
Water temperature matters more than most people realize. Hot water (120-140°F) activates cleaning solutions more effectively and dissolves oils and greasy soils. However, never use boiling water - temperatures above 160°F can damage plastic tanks, void warranties, and potentially melt synthetic carpet fibers.
For delicate carpets, room temperature water provides gentler cleaning while still activating most modern carpet cleaning formulas. This approach works well for wool carpets, which can shrink or felt in hot water.
Step 2: Attach the Handle and Hose (If Applicable)
Most Hoover carpet cleaners require some assembly:
- Slide the handle into the machine body until it clicks
- Secure with the provided screw (hand-tighten only)
- Attach the hose to the port on the back
- Secure the cleaning tool to the hose end
Avoid over-tightening the handle screw - this can strip the threads and create wobble. The handle should feel secure without requiring excessive force. If your handle feels loose even when properly tightened, check the mounting bracket for cracks or wear.
When attaching hoses, ensure a snug fit without forcing connections. Cracked or loose hose fittings are the most common source of leaks in Hoover carpet cleaners. If you notice reduced suction or water leaking during use, check all hose connections first before assuming a mechanical problem.
Step 3: Position the Machine and Turn On
- Plug the machine into a grounded outlet (avoid extension cords if possible)
- Position the cleaner at the farthest corner from your exit path
- Press the power button to turn on the machine
- Wait for the motor to reach full speed (usually 10-15 seconds)
Starting in the farthest corner prevents walking on freshly cleaned carpet. Plan your route so you work backward toward the exit, similar to mopping a floor. For L-shaped or irregularly shaped rooms, clean the most remote section first, then work toward the doorway.
If you must use an extension cord, choose a heavy-duty 14-gauge or thicker cord rated for at least 12 amps. Inadequate extension cords cause voltage drops that reduce motor power and can trigger thermal protection switches. Never run extension cords under carpets or through doorways where they could be damaged.
Step 4: Begin Cleaning Passes
For Upright Models (Power Scrub, SmartWash):
- Squeeze the trigger to release cleaning solution while pushing forward slowly
- Release the trigger and pull backward slowly to extract dirty water
- Overlap each pass by 2-3 inches to ensure complete coverage
- Work in sections approximately 3 feet wide
For Extractor Models (SteamVac):
- Press the spray trigger while moving forward at a steady pace
- Release trigger and pull back to extract
- Repeat the wet pass if the carpet is heavily soiled
- Make a final dry pass (no trigger) to extract maximum moisture
Pace matters enormously. The most common mistake is moving too quickly - the machine needs time to agitate fibers, apply solution, and extract dirty water. A proper forward pass should take about 3 seconds per foot. The backward extraction pass should be even slower, about 2 seconds per foot.
For heavily soiled carpets, make multiple passes in different directions. First pass north-south, second pass east-west. This cross-hatching technique ensures the brushes reach dirt from multiple angles and prevents matting in one direction.
Step 5: Use the Rinse Cycle
After cleaning with detergent, fill the clean water tank with fresh hot water only (no solution). Run over the carpet again using the same technique. This rinse cycle removes detergent residue that would otherwise attract dirt and make carpets resoil quickly.
The rinse cycle is not optional - it’s the difference between carpets that stay clean for months and carpets that look dirty again within weeks. Detergent residue is sticky and acts like a magnet for dirt, dust, and foot traffic soil. Even “rinse-free” solutions benefit from a clear water rinse.
For best results, make at least two rinse passes over the entire carpet. The first rinse lifts most residual detergent, while the second ensures complete removal. You’ll know you’ve rinsed enough when the extracted water in your dirty tank runs clear rather than foamy or cloudy.
Step 6: Empty and Clean the Machine
- Turn off and unplug the machine
- Remove the dirty water tank and pour contents down a toilet or utility sink (not kitchen sinks - carpet debris can clog drains)
- Rinse both tanks thoroughly with clean water
- Remove and rinse the brush roll and nozzle
- Allow all components to dry before storage
Proper post-cleaning maintenance prevents odors and extends machine life. Standing water in tanks creates an ideal environment for bacteria and mold growth, which causes that characteristic musty smell in poorly maintained carpet cleaners.
After rinsing tanks, wipe them down with a cloth dampened with white vinegar - this removes soap film and neutralizes odors. Leave tank caps off during storage to allow complete air circulation. Store the machine in a dry location, never in damp basements or humid garages where moisture promotes mold growth.
Model-Specific Instructions
Hoover Power Scrub Series
The Power Scrub line (including the popular FH50150 Deluxe) features SpinScrub brushes that counter-rotate for deep agitation.
Key Features:
- SpinScrub Brushes: Counter-rotating brushes scrub carpet fibers from all angles
- Dual Tank System: Separate clean and dirty water tanks prevent cross-contamination
- HeatForce Technology: Applies heated air to speed drying time
Usage Tips: The Power Scrub is more aggressive than other models - perfect for heavily soiled carpets but potentially too harsh for delicate rugs. For antique or hand-woven rugs, use the gentle cycle or consider professional cleaning. When using HeatForce, position the machine so the heated air flows across the carpet you just cleaned. This feature can reduce drying time by 25-30%.
If your Power Scrub leaves excessive water, you’re likely moving too quickly. Slow your pace and make additional dry passes.
The Power Scrub excels at high-traffic areas like hallways and entryways where dirt gets ground deep into carpet backing. For these areas, make three passes: one forward with solution, one backward extraction, and one final dry pass. This triple-pass technique lifts embedded soil that single passes miss.
Models like the Power Scrub Deluxe include antimicrobial brushes that resist odor-causing bacteria. However, these brushes still need regular cleaning - rinse after every use and deep clean monthly by soaking in warm water with a few drops of dish soap.
Hoover SteamVac Series
SteamVac models use a different cleaning action with rotating brushes and extraction power focused on removing embedded dirt.
Key Features:
- Powered Hand Tool: Includes upholstery and stair cleaning attachment
- Clean Surge Control: Extra solution for heavily soiled areas
- SpinScrub Hand Tool: Rotating brushes for furniture and stairs
Usage Tips: The Clean Surge button delivers extra cleaning solution - use it for spot treating stains or heavily trafficked areas, but don’t overuse it on the entire carpet or you’ll extend drying time significantly.
For stairs, use the powered hand tool rather than the main unit. The SteamVac’s hand tool is actually more effective on stairs than many dedicated spot cleaners.
When cleaning upholstery, use minimal solution and maximum extraction. Fabric absorbs water more readily than carpet, making over-wetting a real risk.
The SteamVac’s powered hand tool attachment transforms the machine into a versatile cleaner for more than just floors. Use it on:
- Car interiors (seats, floor mats, headliners)
- Mattresses (helps with allergen removal)
- Curtains and drapes (test for colorfastness first)
- Pet beds and cushions
When using the hand tool, work in small sections and extract thoroughly before moving on. Upholstery and fabric items dry more slowly than carpet, so err on the side of using less water rather than more.
Hoover SmartWash Series
SmartWash models automate much of the cleaning process, making them ideal for beginners.
Key Features:
- Automatic Cleaning: Push forward to wash, pull back to dry - no trigger needed
- Auto-Mix: Precisely mixes solution and water automatically
- Auto-Clean: Self-cleaning brush roll after use
Usage Tips: The SmartWash’s automation is genuinely helpful but doesn’t eliminate technique. You still need to:
- Move slowly for heavily soiled areas
- Overlap passes for complete coverage
- Make rinse-only passes after cleaning
The Auto-Clean feature runs after you finish cleaning - don’t skip this step as it maintains brush performance.
The SmartWash automatic system works by detecting forward and backward motion. Push forward triggers solution spray and brush rotation. Pull backward activates extraction mode. This design eliminates the constant trigger squeezing that causes hand fatigue with traditional models.
However, the automation has limitations. For spot treating specific stains, you may find the SmartWash less precise than trigger-controlled models. The solution dispenses whenever you move forward, which can waste cleaning solution if you’re only targeting small areas. For spot cleaning, use the included hose attachment rather than the main cleaning head.
The Auto-Mix feature ensures consistent solution concentration, but you still need to monitor tank levels. The machine cannot adjust for hard water or heavily soiled conditions - you may need to run additional passes in these situations.
Advanced Cleaning Techniques
Traffic Lane Treatment
Traffic lanes - those dark paths that form in high-use areas - require special attention. These areas accumulate more soil and often contain oil from skin contact (especially near doorways where people touch walls for support).
For traffic lanes:
- Pre-treat with an oil-cutting pre-spray
- Make three wet passes instead of one
- Use the Clean Surge feature (if available) on each pass
- Make two extraction passes for thorough moisture removal
- Finish with a rinse-only cycle
Edge and Corner Cleaning
Carpet edges trap dirt that the main cleaning head can’t reach effectively. Many Hoover models include edge cleaning brushes, but proper technique matters:
- Angle the machine so brushes reach as close to baseboards as possible
- Make slower passes along edges
- Use the crevice tool attachment for corners
- Vacuum edges again after carpet cleaning to pick up loosened debris
For persistent edge soiling, use a handheld scrub brush with carpet cleaning solution before running the machine along walls.
Pet Odor and Stain Removal
Pet accidents require immediate attention for best results. For fresh accidents:
- Blot up as much liquid as possible with paper towels
- Apply enzyme cleaner and let sit for 15 minutes
- Blot again before using the carpet cleaner
- Make multiple extraction passes to remove all moisture and odor-causing bacteria
- For persistent odors, mix white vinegar (1 cup per gallon) into your rinse water
For set-in pet stains, you may need to repeat the cleaning process 2-3 times. Our guide on how to deep clean carpet covers additional techniques for stubborn soiling. The odor-causing compounds from pet urine can penetrate into carpet padding and even subflooring. If odors persist after thorough cleaning, the issue may be in the padding - consider professional remediation or padding replacement.
Carpet-Specific Considerations
Berber Carpets
Berber and loop-pile carpets require modified technique. The loop construction traps water more readily than cut-pile carpets.
For Berber:
- Use less solution than recommended (start with 75% of normal amount)
- Make extra dry extraction passes
- Never use rotating brush attachments at full speed - they can snag and pull loops
- Allow extended drying time (12-18 hours)
Frieze and Shag Carpets
High-pile carpets like frieze or shag present unique challenges. The long, twisted fibers can tangle around brushes, and the deep pile holds more water.
Best practices:
- Reduce brush rotation speed if your model has adjustable settings
- Make slow passes to prevent tangling
- Use maximum extraction passes (at least three)
- Consider spot cleaning instead of full room cleaning for very deep pile carpets
- Never walk on freshly cleaned shag until completely dry - wet fibers compress and mat
Commercial and Low-Pile Carpets
Office and commercial carpets typically have very low, dense pile. These carpets:
- Clean quickly and efficiently with standard technique
- Dry faster than residential carpets (4-6 hours typical)
- Show results immediately - dirt extraction is highly visible
- Benefit from quarterly cleaning due to heavy traffic
Drying and Post-Cleaning Care
Optimizing Drying Time
Proper drying prevents mold, mildew, and that unpleasant damp carpet smell. Accelerate drying by:
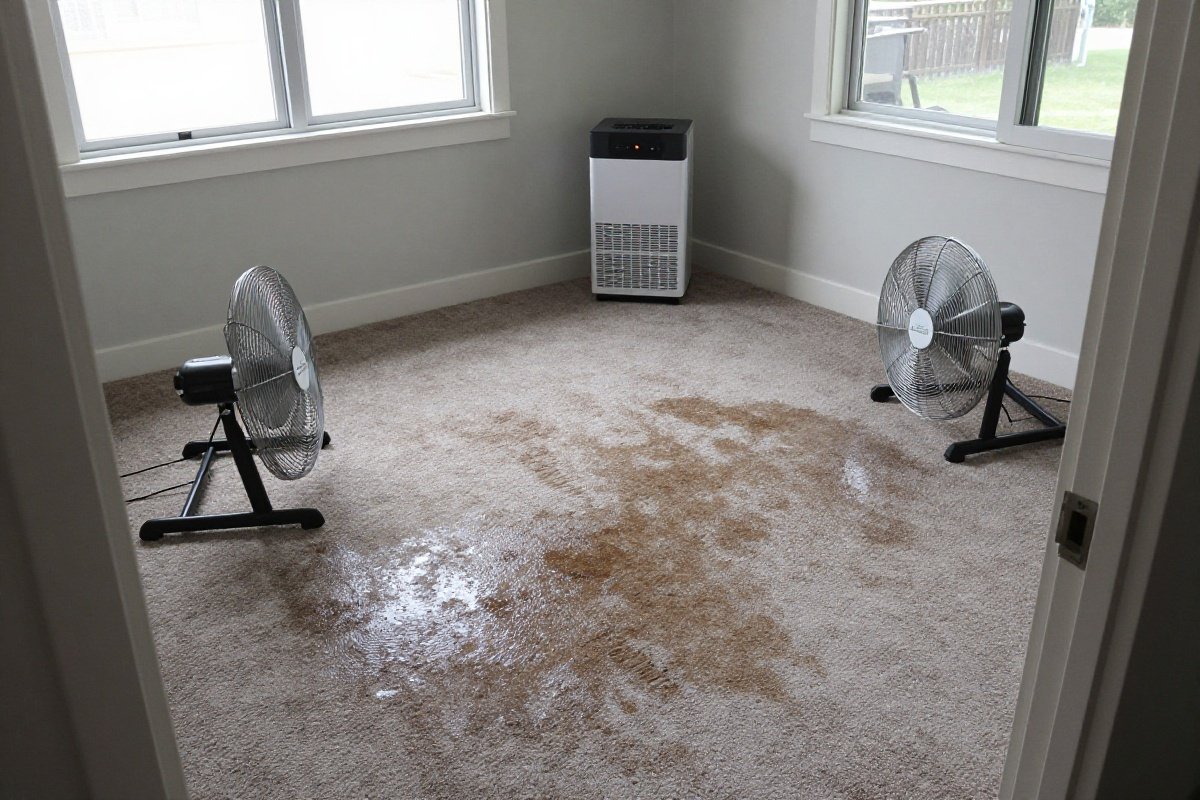
Air Circulation:
- Open windows for cross-ventilation (weather permitting)
- Run ceiling fans on high speed
- Position box fans to blow across carpet surface
- Use dehumidifiers in humid climates or basements
Temperature Control:
- Increase room temperature to 75-80°F during drying
- Use the machine’s heat feature during extraction passes
- Avoid cleaning on humid days when possible
- In winter, ensure heating system is running
Physical Methods:
- Walk on carpet wearing clean, dry socks to press moisture to surface where it evaporates faster
- Use squeegees or hard plastic brushes to work remaining moisture toward extraction
- Place towels in doorways to prevent tracking dirt onto damp carpet
When to Walk on Cleaned Carpets
Wait at least 6 hours before walking on cleaned carpet with bare feet or clean socks. Wait 12-24 hours before:
- Walking in street shoes
- Replacing furniture
- Allowing pets on the carpet
- Closing windows and turning off fans
Walking on damp carpet compresses fibers and can transfer dirt from shoes deep into the wet pile. If you must cross the carpet before it’s dry, place clean towels or cardboard as temporary walkways.
Replacing Furniture Safely
Once carpet is dry to the touch (usually 8-12 hours), you can begin replacing furniture:
For Light Furniture:
- Simply place back in position
- Check the next day for any moisture transfer
For Heavy Furniture:
- Place aluminum foil squares or furniture coasters under legs
- Leave these protectors in place for 24 hours
- Remove once carpet is completely dry
For Wood Furniture:
- Use foam blocks or plastic furniture cups to prevent moisture from being absorbed by wood legs
- Wood can stain carpet if it sits on damp fibers, and moisture can damage wood finishes
Seasonal Cleaning Strategies
Spring Cleaning
Spring represents the optimal time for deep carpet cleaning:
- Moderate temperatures aid drying
- Open windows without excessive energy costs
- Removes winter salt, mud, and tracked-in debris
- Prepares home for increased foot traffic from outdoor activities
Focus on entryways, mudrooms, and high-traffic paths during spring cleaning. These areas accumulate the most winter damage.
Fall Cleaning
Fall cleaning prepares carpets for the heavy indoor season:
- Removes summer dust and allergens before windows close for winter
- Addresses outdoor allergens tracked inside
- Creates fresh baseline before holiday entertaining
- Takes advantage of low humidity for faster drying
Summer and Winter Considerations
Summer and winter present challenges for carpet cleaning:
Summer Issues:
- High humidity extends drying time - use dehumidifiers
- Increased cooling costs if you raise temperature for drying
- More outdoor pollutants tracked inside
Winter Issues:
- Lower ambient humidity helps drying but heating costs rise
- Salt and de-icer stains require special treatment
- Cold temperatures make using outdoor ventilation impractical
If you must clean carpets during these seasons, choose days with moderate weather and plan for extended drying time.
Troubleshooting Common Issues
Machine Won’t Turn On

Check These:
- Outlet is working (test with another device)
- Power cord is fully plugged in
- Circuit breaker hasn’t tripped
- Power switch is firmly depressed
If the machine still won’t start, the thermal protector may have activated from overheating. Unplug and let cool for 30 minutes before retrying.
Not Spraying Water or Solution
Common Causes:
- Tank not seated properly - remove and reinsert
- Solution line clogged - run warm water through the system
- Trigger mechanism stuck - check for debris around the trigger
- Tank empty or cap loose - refill and secure tightly
Carpet Too Wet After Cleaning
Causes and Solutions:
- Moving too fast: Slow down extraction passes
- Not enough dry passes: Make 2-3 passes without spraying
- Dirty tank full: Empty the dirty water tank
- Over-application of solution: Use recommended dilution ratios
Machine Leaving Streaks or Lines
Solutions:
- Clean the brush roll thoroughly (hair and debris cause uneven cleaning)
- Check that the nozzle is seated properly
- Ensure you’re using the rinse cycle adequately
- Replace worn brushes (typically needed every 2-3 years with regular use)
Excessive Foam or Bubbling
Too much foam indicates:
- Too much detergent used
- Wrong type of cleaning solution
- Previous soap residue in carpet
Solution: Empty tanks, rinse thoroughly, and restart with proper solution ratios.
Loss of Suction Power
If your Hoover suddenly loses suction:
- Check the dirty water tank - if it’s full, suction stops automatically on most models
- Inspect the filter - clogged filters drastically reduce suction
- Examine hoses for cracks or loose connections
- Ensure the nozzle isn’t clogged with debris or carpet fibers
- Check for objects blocking the air pathway
Loss of suction is the most common complaint about carpet cleaners, but it’s usually a simple fix. Empty the tank, clean the filter, and check all connections before assuming a mechanical failure.
Machine Making Unusual Noises
Different noises indicate different problems:
Grinding or clicking: Debris caught in brush roll - turn off immediately and clear High-pitched whining: Belt slipping or motor strain - check for obstructions Gurgling: Normal sound of water moving through the system Rattling: Loose component or improperly seated tank - check all connections
Never operate a carpet cleaner that makes grinding or clicking noises. These sounds indicate mechanical stress that can cause permanent damage. Stop immediately, turn off the machine, and investigate the source.
Maintenance and Care
Proper maintenance extends your Hoover’s life and maintains cleaning performance.
After Each Use
- Empty both tanks completely - standing water breeds bacteria and odors
- Rinse tanks with clean water - prevents residue buildup
- Remove and rinse the brush roll - hair and debris reduce effectiveness
- Clean the nozzle and filter - blockages reduce suction
- Wipe down the machine exterior
- Allow all components to dry before reassembly and storage
Monthly Maintenance
- Deep clean the brush roll: Remove wrapped hair and fiber
- Check and clean filters: Rinse under warm water, air dry completely
- Inspect hoses for cracks or leaks
- Clean the solution trigger mechanism
Annual Maintenance
- Replace the brush roll if bristles are worn or damaged
- Replace filters even if they appear clean
- Professional service for heavy-use machines (commercial settings)
- Descale if you have hard water - mineral buildup affects performance
Further Reading
- Best Vacuum Cleaner Brands in 2026: Complete Buyer’s Guide by Price & Specialty
- Vacuum Buying Guide 2026: How to Choose the Best Vacuum Cleaner
- Where Are Dyson Vacuums Made? Complete Manufacturing Guide (2026)
Safety Precautions
Electrical Safety
- Never handle the plug or machine with wet hands
- Don’t use outdoors or on wet surfaces
- Keep cord away from heated surfaces
- Unplug when not in use and before maintenance
- Don’t pull the machine by the cord
Chemical Safety
- Keep cleaning solutions away from children and pets
- Store in original containers with labels intact
- Never mix different cleaning chemicals
- Ventilate the room during and after cleaning
Physical Safety
- Lift properly - these machines weigh 15-20 lbs when full
- Watch for slippery surfaces after cleaning
- Don’t overfill tanks - spills can damage flooring
- Keep electrical cords away from cleaning path
Recommended Products
Hoover Power Scrub Deluxe Carpet Cleaner FH50150
Best overall HooverBest Hoover carpet cleaner for most homes with balanced features and price.
What We Like
- SpinScrub brush system with 6 rotating brushes for deep cleaning
- Dual tank technology keeps clean and dirty water separate
- Lightweight at 18.5 lbs for easier portability
- HeatForce technology for faster drying
What We Don't
- Smaller 1-gallon tank capacity requires more frequent refills
- Less powerful motor than professional-grade models like Bissell Big Green
- 20-foot cord limits reach in larger rooms without switching outlets
Hoover SmartWash+ Automatic Carpet Cleaner
First-time carpet cleaner buyers, busy householdsThe Hoover SmartWash+ eliminates the guesswork of carpet cleaning with automatic wash-on-push and dry-on-pull motion sensing, auto-mix detergent dispensing, and FlexForce PowerBrushes for deep agitation. It is best for first-time carpet cleaner buyers or busy households who want professional-quality results without manual controls or learning a cleaning technique.
What We Like
- Automatic cleaning technology - push forward to wash, pull back to dry
- Auto-mix solution system eliminates measuring guesswork
- Auto-clean mode for hassle-free maintenance
- Powerful suction removes more water for faster drying
- FlexForce PowerBrushes for improved cleaning performance
What We Don't
- No manual override for targeted cleaning of stubborn stains
- Heavier than basic models at 19.5 lbs
- Premium price point compared to standard models
Hoover CleanSlate Plus Carpet & Upholstery Cleaner FH14000
Best spot cleanerThe Hoover CleanSlate Plus FH14000 combines HeatForce drying, antimicrobial brush protection, and a self-cleaning hose system in a compact portable design purpose-built for targeted stain removal. It is best for pet owners and families who need a dedicated spot cleaner for upholstery, stairs, and car interiors.
What We Like
- Compact design perfect for spot cleaning
- Great for stairs and upholstery cleaning
- Powerful suction for quick spot removal
- HeatForce for faster drying
- Self-cleaning hose system
- Antimicrobial brush protection
What We Don't
- Small tank capacity not ideal for large areas
- Not designed for whole-room carpet cleaning
- Shorter cord limits reach
- Heavier than some portable cleaners
Sources & Research
Continue Reading
Explore more buying guides content or browse our other categories.
Frequently Asked Questions
- How often should I clean my carpets with a Hoover carpet cleaner?
- For most households, deep clean carpets every 12-18 months. High-traffic homes with pets or children should clean every 6 months. Light-use rooms can go 2 years between cleanings. More frequent cleaning prevents dirt buildup and extends carpet life. Always spot-clean spills immediately to prevent staining.
- Can I use any carpet cleaning solution in my Hoover?
- Hoover recommends using their branded solutions for optimal performance and warranty protection. However, any quality carpet cleaning solution designed for extraction machines will work. Avoid regular household cleaners, dish soap, or laundry detergent - these create excessive foam that can damage the machine and leave residue on carpets.
- How long does it take carpets to dry after using a Hoover carpet cleaner?
- Carpets typically dry in 6-12 hours after cleaning with a Hoover. Speed drying by running ceiling fans, opening windows for ventilation, or using a box fan. Using the rinse-only cycle (no detergent) removes more moisture. Never walk on damp carpets with street shoes, and wait until completely dry before replacing furniture.
- Why is my Hoover carpet cleaner leaving dirty streaks?
- Streaks usually indicate dirty brushes or inadequate rinsing. Clean the brush roll thoroughly, ensure you're using the rinse cycle properly, and slow down your cleaning passes. Also check that the dirty water tank isn't overfilled. Using too much detergent can also leave residue - follow the recommended solution-to-water ratio.
- Can I use a Hoover carpet cleaner on hardwood or tile floors?
- No, Hoover carpet cleaners are designed specifically for carpet and upholstery. Using them on hard floors can damage both the floor and the machine. For hard floors, use a Hoover hard floor cleaner or mop designed for that surface. Some Hoover models have separate hard floor attachments - check your manual for compatibility.
Written By
Home Vacuum Zone
Our team researches, tests, and reviews vacuum cleaners to help you make confident buying decisions.
Related Articles
Vacuum Noise Level Comparison: Decibel Ratings for 60+ Models (2026 Database)
Comprehensive vacuum noise level database with decibel ratings for 60+ models across every vacuum type. Find the quietest vacuums and understand what dB ratings actually mean.
Vacuum Suction Power Chart: AW, Pa & kPa Ratings Compared (2026 Database)
Comprehensive vacuum suction power database with air watts, pascals, and kPa ratings compared across every vacuum type. Find how much suction you actually need.
Bagged vs Bagless Vacuums: Which Type Is Actually Better?
Bagged and bagless vacuums each have distinct advantages for different households. We compare cost, filtration, allergen control, maintenance, and convenience to help you choose the right type.