Affiliate Disclosure:Home Vacuum Zone is reader-supported. When you buy through links on our site, we may earn an affiliate commission at no additional cost to you. This does not influence our reviews or recommendations — we only recommend products we genuinely believe in.
Your vacuum cleaner works hard to keep your home clean - but are you returning the favor? Regular maintenance not only ensures optimal performance but can extend your vacuum’s lifespan by years and save you hundreds in replacement costs.
This comprehensive guide covers everything from daily DIY care to professional servicing, helping you get the most from your investment.
Why Maintenance Matters
The Cost of Neglect
A poorly maintained vacuum:
- Loses suction power gradually (often unnoticed until severe)
- Works harder, consuming more electricity
- Spreads dust and allergens instead of capturing them
- Fails prematurely, requiring expensive replacement
- Can damage carpets and floors with worn brushes
Beyond the immediate performance issues, neglected vacuums create hidden costs. A vacuum running with clogged filters can consume 25-40% more electricity while delivering only half the cleaning power. Over a year, this inefficiency can noticeably increase your energy bills. Additionally, worn brush rolls with damaged bristles can snag carpet fibers, causing premature wear to expensive carpeting that costs thousands to replace.
The allergen issue deserves special attention. A vacuum with compromised seals or saturated filters essentially becomes a dust distribution system, pulling particles from carpets and exhausting fine allergens directly into your breathing space. For households with asthma or allergies, this can trigger symptoms and reduce indoor air quality below outdoor levels.
The Benefits of Regular Care
A well-maintained vacuum:
- Maintains peak suction throughout its life
- Cleans more effectively in less time
- Operates more quietly and efficiently
- Lasts 10-20 years instead of 3-5
- Protects your home’s air quality
Regular maintenance creates a positive feedback loop. When your vacuum performs optimally, cleaning sessions become faster and more thorough. You’ll vacuum more willingly and more frequently when the task takes 15 minutes instead of 30. This consistent cleaning prevents dirt from embedding deeply into carpets, which actually makes future cleaning even easier.
The financial impact is substantial. A properly maintained mid-range vacuum that lasts 12 years has a remarkably low annual cost. That same vacuum neglected and replaced every 4 years costs roughly three times more per year - plus the inconvenience of shopping for and breaking in new equipment repeatedly.
DIY Maintenance Schedule
After Every Use (2 Minutes)
1. Empty the Dustbin or Check Bag
- Don’t wait until full - empty at 2/3 capacity
- Full bins/bags reduce suction by 30-50%
- Bagless: Empty outside to avoid dust cloud
- Bagged: Replace when 2/3 full (not completely full)
This simple habit makes the biggest difference in performance. When a dustbin or bag fills beyond 2/3 capacity, the remaining space can’t generate proper airflow. Think of it like breathing through a partially blocked nose - the motor works harder while accomplishing less. For bagless models, take the entire bin outside before opening to prevent dust clouds from settling back onto your freshly cleaned floors.
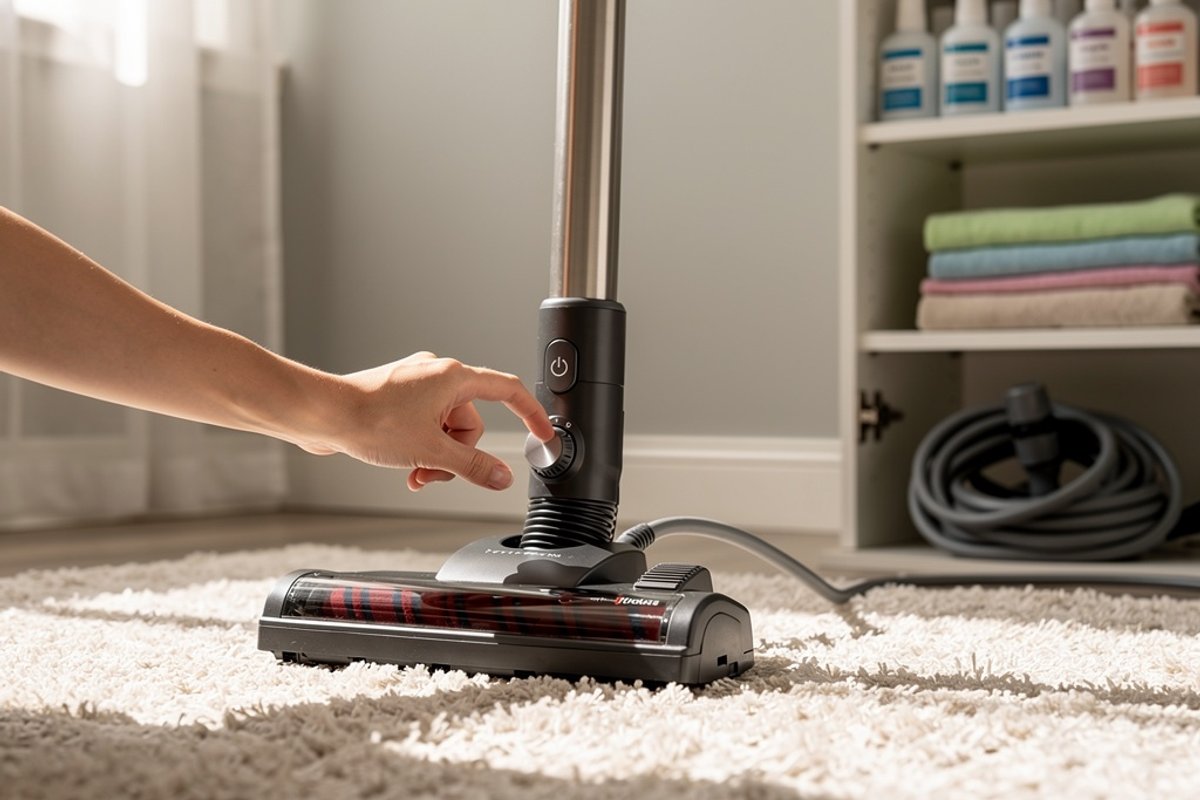
2. Quick Visual Check
- Inspect brush roll for hair wrap
- Check for visible blockages in hose
- Ensure all attachments clicked in properly
- Look for damage to cord or casing
This 30-second inspection catches problems before they become serious. Hair wrapped around the brush roll doesn’t just reduce cleaning effectiveness - it can actually melt from friction heat, creating a burnt smell and potentially damaging the brush bearings. Catching three hairs is easier than removing a compacted mass that requires disassembly.
Weekly (5-10 Minutes)
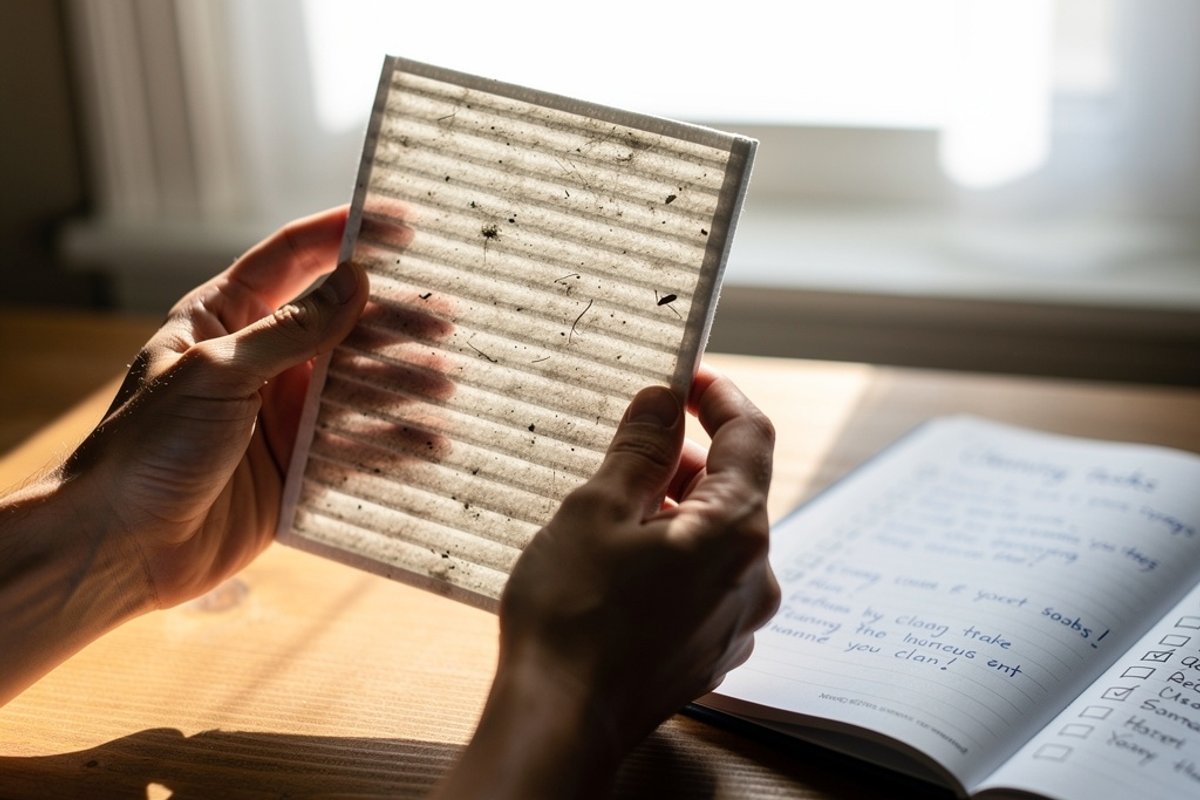
3. Clean or Replace Filters
- Pre-motor filters: Tap out debris, wash if washable
- Post-motor/HEPA filters: Check condition, replace if discolored
- Never operate without filters installed
Filter Types:
- Foam filters: Wash monthly, replace every 6 months
- Pleated filters: Tap weekly, replace every 3-6 months
- HEPA filters: Replace every 6-12 months (not washable)
Understanding how a vacuum cleaner works helps prioritize this maintenance. Pre-motor filters protect the motor from debris damage - skip this, and fine dust particles act like sandpaper on motor components. Post-motor filters (including HEPA) prevent exhaust from contaminating your home. When washing foam filters, use only water or mild soap - detergent residue can damage the foam structure. Always air-dry completely (24 hours minimum) before reinstalling, as damp filters restrict airflow and can grow mold.
4. Clear Brush Roll
- Remove hair, string, and fibers wrapped around brush
- Use scissors carefully (don’t cut bristles)
- Check for worn or damaged bristles
- Ensure brush spins freely
Hair removal technique matters. Start by cutting along the brush length (not around the circumference) so wrapped material slides off in sections. Keep scissors parallel to bristles to avoid accidental trimming. For persistent wrapping, some manufacturers sell specialized brush cleaning tools with recessed blades that prevent bristle damage. After clearing, spin the brush manually - it should rotate smoothly with no resistance or grinding sounds.
5. Wipe Down Exterior
- Clean dust from body and handle
- Wipe attachments with damp cloth
- Check wheels for debris that could scratch floors
Exterior cleaning isn’t just cosmetic. Dust buildup around vents can restrict cooling airflow, causing overheating. Wheels pick up sticky residues that then transfer to your floors, potentially scratching hardwood or leaving marks on tile. Clean wheels with a damp cloth and check that they spin freely - seized wheels force the motor to work harder and can strain the drive mechanism.
Monthly (15-30 Minutes)
6. Deep Clean the Dustbin
- Wash with warm soapy water (bagless models)
- Dry completely before reassembly
- Clean seals and gaskets
- Check for cracks or damage
During monthly cleaning, pay special attention to the dustbin seal - the rubber gasket where the bin meets the vacuum body. This seal is critical for maintaining suction. Clean away any dust buildup, and check for cracks or deformation. A damaged seal can reduce suction by 40% even with a clean bin and fresh filters. If the gasket feels brittle or shows cracks, order a replacement (an inexpensive part) before it fails completely.
7. Inspect and Clean Hoses
- Check full length for blockages
- Use a broom handle or specialized tool to clear clogs
- Wash if very dirty (let dry completely)
- Check for cracks or splits
Hose inspection requires thoroughness. Hold the hose up to light and look through it - you should see clear light from end to end. Blockages often occur at bends where rigid debris gets stuck. Common culprits include pen caps, small toys, and compacted lint balls. For stubborn clogs, a plumber’s snake or flexible grabber tool works better than pushing with a broom handle, which can compact the blockage further. When washing hoses, hang them vertically to drain completely - trapped water leads to mold and musty odors.
8. Check Belts (Uprights)
- Look for cracks, stretching, or glazing
- Ensure proper tension
- Replace if worn (usually annual)
- Note: Some modern vacuums have lifetime belts
Belt inspection is easier when you know what to look for. A healthy belt appears dark black with no shine. A failing belt shows cracks, appears shiny or “glazed,” or feels loose. Glazing occurs when the belt slips, generating heat that melts the rubber surface - this drastically reduces grip. If you smell burning rubber during use, check the belt immediately. Replacement is usually straightforward: remove the bottom plate, slip off the old belt, and install the new one following the manufacturer’s routing diagram.
9. Clean Sensors (Robot Vacuums)
- Wipe cliff sensors with soft cloth
- Clean camera/lidar window
- Empty and clean dustbin thoroughly
- Check and clean charging contacts
Robot vacuum sensors are the “eyes” of the machine. Dusty cliff sensors can cause the robot to avoid edges unnecessarily or, worse, fail to detect stairs. Camera and lidar systems coated in fine dust create mapping errors, causing inefficient cleaning patterns or missed areas. Clean sensors with a microfiber cloth - avoid paper towels which can scratch lenses. Charging contacts develop oxidation over time; clean them monthly with isopropyl alcohol on a cotton swab to ensure reliable charging.
Annually (1-2 Hours)
10. Deep Service
- Disassemble accessible components
- Clean motor compartment (canned air)
- Lubricate moving parts if specified
- Check electrical connections
- Replace worn parts proactively
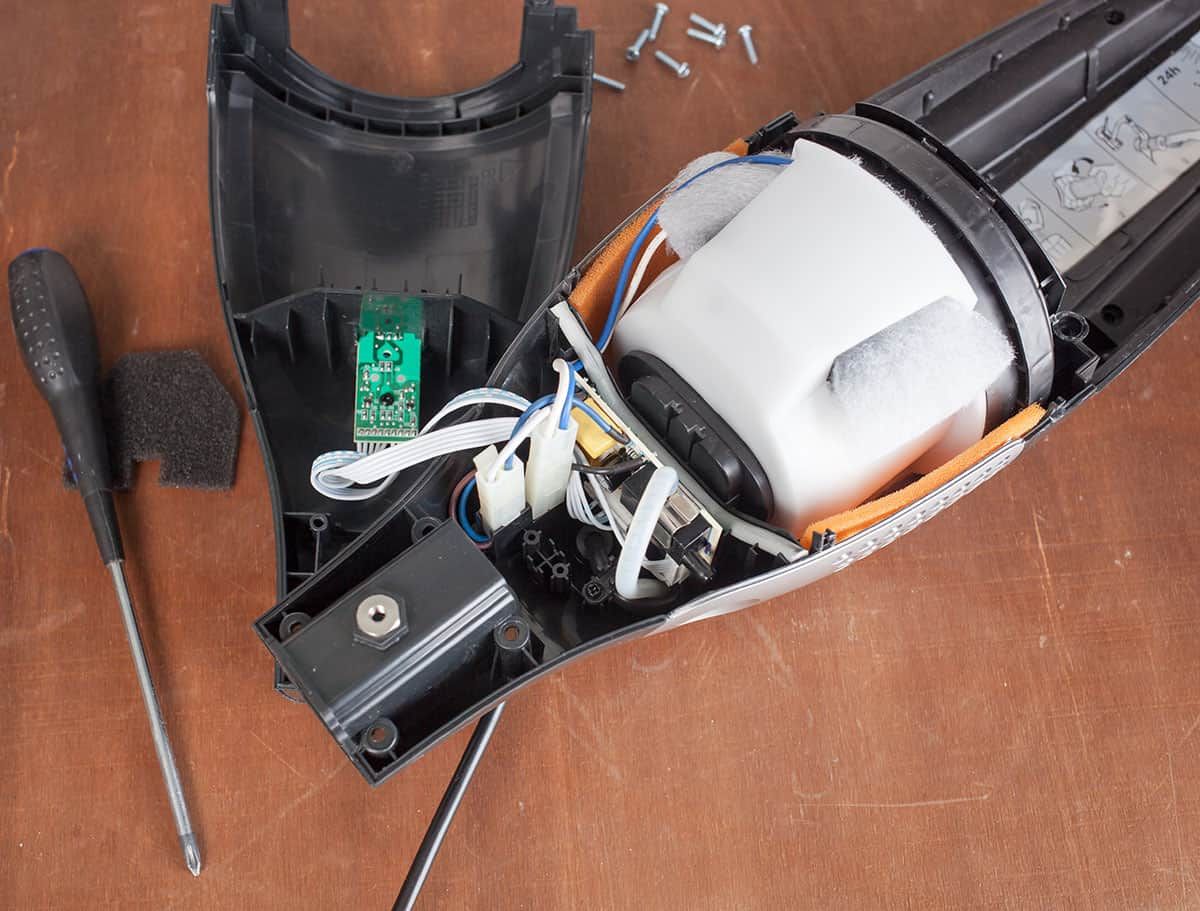
Annual deep service is when you address areas typically inaccessible during routine maintenance. With the vacuum unplugged, remove all accessible covers and plates. Use compressed air to blow dust from the motor compartment - years of fine dust accumulation acts as insulation, causing overheating. Check manufacturer specifications for lubrication points; some vacuums require light oil on specific bearings, while others are sealed and require no lubrication. Over-lubricating can attract dust, so follow guidelines precisely.
11. Professional Evaluation
- Consider annual professional service for premium vacuums (a worthwhile investment)
- Check motor brushes (carbon brushes wear down)
- Test suction with professional gauge
- Verify electrical safety
Professional technicians use calibrated tools to measure actual suction power, not just subjective assessment. They can detect issues like worn motor brushes (carbon contacts that conduct electricity to the motor) before they fail completely. Motor brush replacement is a modest repair that prevents a far more expensive full motor replacement. For vacuums in commercial settings or heavy residential use (daily cleaning of large homes), this annual checkup is particularly valuable.
Warning Signs Your Vacuum Needs Service
Loss of Suction
Possible Causes:
- Full bag/bin
- Clogged filters
- Blockage in hose or airway
- Worn or damaged seals
- Motor issues (professional repair needed)
Troubleshooting:
- Empty bag/bin
- Clean/replace all filters
- Check for hose blockages
- Inspect seals and gaskets
- If still weak, consult professional
Suction loss is rarely sudden unless you’ve sucked up a large blockage. More commonly, it’s gradual and goes unnoticed until cleaning takes twice as long. To establish a baseline, test your vacuum’s suction when new or freshly serviced: hold the hose against your palm - you should feel strong, consistent pull. Repeat this test monthly. When suction drops noticeably despite completing all maintenance steps, the issue likely involves internal seals, motor wear, or damage requiring professional diagnosis.
Unusual Noises
High-Pitched Whine:
- Motor bearing wear
- Belt slipping
- Foreign object in brush roll
Grinding or Rattling:
- Damaged brush roll bearings
- Loose internal components
- Debris in motor fan
Action: Stop using immediately - continued use can cause expensive damage
Noise changes tell important stories. A high-pitched whine that increases in frequency as you push forward often indicates belt slipping on the brush roll - the belt can’t grip properly and is heating up from friction. A rattling sound that changes with head position suggests something loose in the brush housing. Grinding sounds, especially if accompanied by vibration, indicate bearing failure - continued use can destroy the bearing seat, turning a simple repair into a major expense. When in doubt, stop and investigate rather than hoping the noise goes away.
Burning Smell
Possible Causes:
- Overheating motor
- Worn motor brushes
- Belt slipping/friction
- Electrical issue
Action: Unplug immediately. Check for blockages causing motor strain. If smell persists after clearing, professional service required.
Burning smells require immediate attention because they indicate heat generation beyond normal operating temperatures. A belt-burning smell is acrid and rubbery; a motor-burning smell is more electrical and sharp. After unplugging, let the vacuum cool for at least an hour. Check for any blockages restricting airflow - a blocked hose forces the motor to spin faster without moving air, causing overheating. If you’ve cleared all blockages and the smell returns within 5-10 minutes of use, stop immediately - internal motor damage is occurring.
Overheating
Causes:
- Clogged filters forcing motor to work harder
- Blocked airflow
- Full bag/bin
- Motor wear
Solution: Turn off and cool for 30 minutes. Check all filters and clear blockages. If overheating continues, motor may need service.
Many vacuums have thermal cutoff switches that automatically shut down the motor when temperature exceeds safe limits. If your vacuum shuts off after 10-15 minutes of use and won’t restart until it cools, this safety feature is activating. While frustrating, it’s preventing motor burnout. The most common cause is restricted airflow - check every point in the air path from floor head through filters to exhaust. Even a partially clogged pre-motor filter can cause overheating in as little as five minutes of operation.
No Power
Check:
- Outlet (test with another device)
- Circuit breaker
- Cord for damage
- Power switch
- Internal fuse (some models)
If these are fine: Professional electrical diagnosis needed
When troubleshooting no-power issues, work from simplest to most complex. Many vacuums have a reset button near the cord reel or on the body - press it firmly and hold for 3-5 seconds. Some models have replaceable fuses in the plug or body; consult your manual for location. Flex the power cord along its entire length while plugged in (vacuum off at switch) - a damaged internal wire sometimes makes intermittent contact, and flexing will reveal the problem area. Never attempt to splice or tape a damaged power cord; replacement cords are affordable and ensure safe operation.
Professional Service: When and Why
When to Seek Professional Help
Always Use Professional Service For:
- Electrical issues
- Motor problems
- Wiring repairs
- Warranty work
- Internal component replacement
Consider Professional Service When:
- DIY maintenance doesn’t restore performance
- Repair cost exceeds 50% of replacement cost
- Vacuum is premium/high-end model
- Safety concerns exist
- You lack technical confidence
The line between DIY and professional service often depends on comfort level and tools available. For detailed walkthroughs, see our vacuum repair ultimate DIY guide. Replacing a belt on an upright vacuum requires only a screwdriver and 10 minutes. Replacing motor brushes requires partially disassembling the motor housing and proper carbon brush installation - manageable for mechanically inclined users, but risky for others. Electrical work, however, should always be professional unless you’re a qualified electrician. Vacuum motors store electrical charges even when unplugged, and improper handling creates shock hazards.
Professional service also makes sense for time-value calculations. If you value your time highly, spending three hours diagnosing and repairing a vacuum yourself represents a significant opportunity cost - often more than professional service. For busy professionals, periodic professional service every two years is more cost-effective than DIY struggles.
Choosing a Service Center
Qualifications to Verify:
- Authorized Service Provider: Brand-certified technicians
- Qualified Technicians: Registered electricians for electrical work
- Genuine Parts: OEM parts, not generic substitutes
- Warranty: Service warranty on repairs (typically 90 days)
- Transparent Pricing: Written estimates before work
- Reviews: Customer feedback and reputation
Questions to Ask:
- Do you service this brand/model?
- What’s your diagnostic fee?
- Do you provide written estimates?
- What warranty comes with repairs?
- How long will service take?
Finding quality service requires research. Start with the manufacturer’s website for authorized service centers - these technicians receive factory training and have access to technical documentation unavailable to independent shops. Read recent online reviews (within six months) focusing on reviewers’ specific experiences rather than just star ratings. Red flags include shops that refuse to provide written estimates, push for immediate approval without diagnosis, or can’t explain what they’re repairing and why.
Ask about parts sourcing. Generic replacement parts cost less but often underperform OEM components. A generic motor might cost half as much as an OEM part, but if it lasts 18 months instead of 5 years, you’ll pay more long-term. Reputable shops explain the difference and offer both options transparently.
What Professional Service Includes
External Check:
- Cord and plug condition
- Case and housing integrity
- Wheel and handle condition
- Switch operation
Internal Maintenance:
- Motor testing and brush inspection
- Bearing lubrication
- Belt tension and condition
- Filter housing inspection
- Seal and gasket replacement
Electrical/Electronic:
- Wiring inspection
- Circuit board testing (robot/smart vacuums)
- Safety switch verification
- Ground fault testing
A thorough professional service goes beyond component replacement. Technicians test motor amp draw to assess overall motor health - a motor drawing excessive amps is wearing out even if it still runs. They measure actual suction with calibrated gauges, providing objective performance data. For robot vacuums, they can run diagnostic software to check sensors, motors, and programming - information impossible to access without specialized equipment.
Expect the service to take several days to a week. Rush service is possible but usually costs extra. Ask for a detailed service report listing what was inspected, what was repaired, and recommendations for future maintenance. This documentation proves valuable if issues recur or when deciding whether to repair or replace years later.
Maintenance by Vacuum Type
Upright Vacuums
Key Maintenance Areas:
- Brush roll and belt (most common issues)
- Height adjustment mechanism
- Self-propel system (if equipped)
- Hose and wand connections
Common Repairs:
- Belt replacement (very affordable DIY, moderate for professional service)
- Brush roll replacement (moderate cost)
- Height adjustment repair (moderate cost)
Upright vacuums are generally the most DIY-friendly for maintenance. Most models have bottom plates secured by 4-6 screws, providing access to the brush roll and belt. When replacing belts, note the routing path - many uprights use a specific belt path around pulleys that must be followed exactly. Taking a photo before removal helps during reassembly. The height adjustment mechanism accumulates hair and debris; clean it monthly to ensure smooth operation. Self-propel systems require occasional cleaning of the drive wheels and transmission - consult your manual for specific procedures, as designs vary significantly by manufacturer.
Canister Vacuums
Key Maintenance Areas:
- Hose (check for cracks and clogs)
- Wand connections
- Powerhead brush and belt
- Retractable cord mechanism
Common Repairs:
- Hose replacement (moderate cost)
- Wand repair (moderate cost)
- Cord reel replacement (significant expense)
Canister vacuums concentrate stress on the hose and wand connections - these components connect and disconnect hundreds of times, creating wear points. Inspect connection points for cracks, and ensure locking mechanisms click firmly. A loose connection causes air leaks that reduce suction substantially. The retractable cord mechanism requires special attention; don’t let the cord snap back violently, as repeated impacts damage the internal reel. If cord retraction becomes sluggish, the spring may need professional service before it fails completely.
Powerhead maintenance on canister vacuums is identical to upright brush rolls, but access often requires removing screws from the powerhead bottom. Some premium canisters have electric hoses with wiring integrated into the hose body - these cannot be washed with water and require professional replacement if damaged.
Cordless/Stick Vacuums
Key Maintenance Areas:
- Battery care and charging habits
- Filter cleaning (critical for suction)
- Brush roll clearing
- Charging contacts
Battery Maintenance:
- Don’t leave on charger 24/7 (reduces lifespan)
- Store at 50% charge if not using for weeks
- Replace battery when runtime drops below 50%
- Use only manufacturer chargers
Common Repairs:
- Battery replacement (significant expense)
- Trigger switch repair (moderate cost)
- Motor replacement (major expense - often warrants buying new)
Cordless vacuum maintenance centers on battery care. Lithium-ion batteries - used in virtually all modern cordless vacuums - last longest with partial discharge cycles rather than full depletion. Ideally, recharge when the battery reaches 20-30% rather than running until shutoff. Heat is battery enemy number one; store cordless vacuums in climate-controlled spaces, not hot garages or sheds. If you notice the battery getting unusually warm during charging, stop use and contact the manufacturer - overheating batteries can be safety hazards.
Filter maintenance is even more critical in cordless models than corded ones. The compact design means less margin for error - a partially clogged filter impacts suction immediately. Many cordless models have two or three filters in the air path; clean all of them weekly for daily use, every two weeks for occasional use.
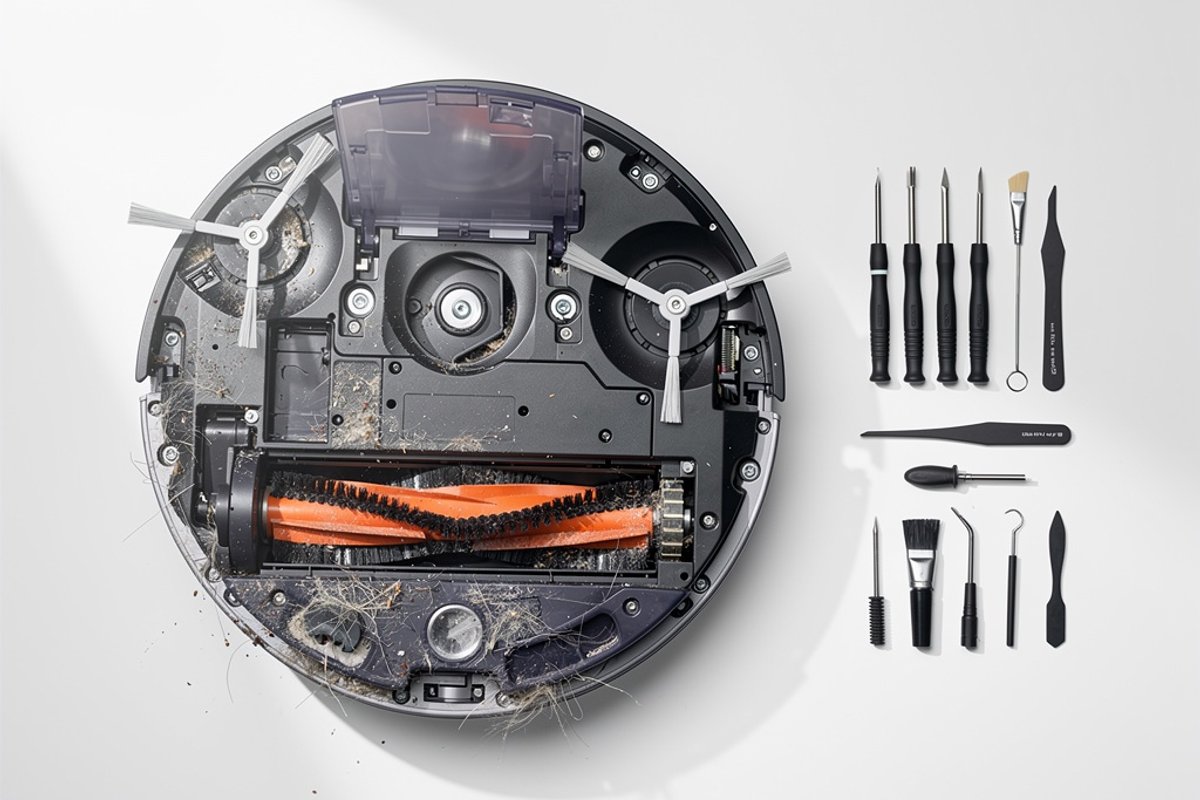
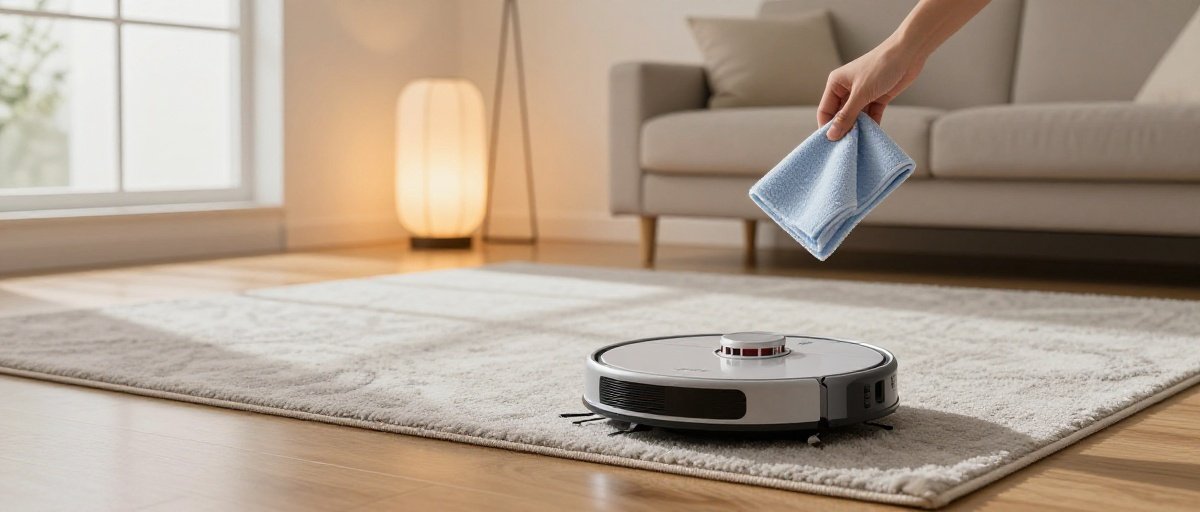
Robot Vacuums
Key Maintenance Areas:
- Sensors (clean weekly)
- Brushes and extractors
- Wheels and casters
- Charging dock contacts
- Filter and dustbin
Common Repairs:
- Battery replacement (moderate cost)
- Wheel motor replacement (significant expense)
- Mainboard repair (major expense - may exceed the robot’s value)
Robot vacuum maintenance differs significantly from traditional vacuums due to autonomous operation. These devices can’t tell you when something’s wrong - they just clean less effectively. Brush maintenance requires extra attention because robots work independently; a tangled brush that would be obvious in a manual vacuum goes unnoticed until performance drops. Check brushes after every 2-3 runs, more frequently in homes with long-haired pets.
Wheel maintenance prevents navigation issues. Robot wheels collect hair around the axles, which restricts movement and causes erratic navigation. Remove wheels monthly (most pop out without tools) and clear all hair from axles and wheel treads. Clean the caster wheel (the small wheel at front or back) simultaneously - this often-forgotten component affects navigation accuracy significantly.
Charging dock placement affects maintenance needs. Docks placed in dusty areas or near heat vents accumulate debris on contacts faster. Position docks in low-traffic areas against walls with good air circulation. Clean charging contacts on both robot and dock weekly with a dry cloth, monthly with rubbing alcohol.
Cost-Benefit Analysis: Repair vs. Replace
When to Repair
Repair Makes Sense When:
- Vacuum is less than 5 years old
- Cost is under 50% of replacement
- It’s a premium model (Miele, Dyson, SEBO)
- Issue is minor (belt, filter, hose)
- Vacuum meets your needs well
The repair decision becomes clearer with specific scenarios. A three-year-old premium Miele canister vacuum needing a motor repair at a fraction of replacement cost makes repair obvious. The same vacuum will likely provide 10+ more years of service, giving excellent return on repair investment. Conversely, a two-year-old budget upright needing motor work that approaches half the replacement cost puts you in borderline territory where replacement might be better, especially if newer models offer improved features.
Consider emotional factors honestly. If you’re frustrated with the vacuum’s weight, noise, or design, repair might restore function but not satisfaction. That repair investment buys dissatisfaction for another 3-5 years. Sometimes replacement makes psychological sense even when repair is technically cost-effective.
When to Replace
Replace Instead of Repair When:
- Vacuum is over 7-10 years old
- Repair exceeds 60% of new cost
- Multiple components are failing
- Technology has significantly improved
- Your needs have changed
Multiple simultaneous failures signal end-of-life. When a vacuum needs belt, hose, and motor work simultaneously, additional components will likely fail soon, requiring cascading repairs. In these cases, replacement provides better value. Technology improvements also factor into the equation. A 10-year-old vacuum might be repairable, but newer models offer HEPA filtration, cordless convenience, smart mapping, and improved efficiency that transform the cleaning experience.
Life changes justify replacement regardless of vacuum condition. Consult our vacuum buying guide for help choosing a new model. A growing family with new carpeting has different needs than the single person who bought a stick vacuum five years ago. A household with a new pet might need specialized pet hair features. An aging household member might require a lighter, easier-to-maneuver model. These scenarios make replacement about capability rather than cost.
Typical Service Costs (2026)
DIY Maintenance Supplies: Very affordable per year
- Filters: modest cost
- Belts: minimal cost
- Cleaning supplies: minimal cost
Professional Service: Moderate per visit
- Diagnostic: affordable
- Basic service: moderate
- Major repair: significant investment
Replacement Cost: Varies widely by tier
- Budget: affordable
- Mid-range: moderate investment
- Premium: significant investment
These costs help frame the repair-versus-replace decision. Annual DIY maintenance on a mid-range vacuum represents a small fraction of the vacuum’s value - an excellent investment for extended lifespan. Professional service annually represents a larger percentage but is still reasonable if it doubles lifespan from 5 to 10 years. However, for a budget vacuum, professional service rarely makes economic sense; replacement every 4-5 years costs less long-term.
Budget for maintenance when purchasing. A premium vacuum with modest annual maintenance over 10 years has a surprisingly low annual cost. A budget vacuum replaced every 4 years may seem cheaper per year with minimal maintenance - but provides inferior performance throughout its shorter life. The true cost calculation includes both purchase price and expected maintenance over realistic lifespan.
Creating Your Maintenance Routine
Set Calendar Reminders
Phone/Calendar Alerts:
- Weekly: Filter check
- Monthly: Deep cleaning
- Quarterly: Belt inspection
- Annually: Professional service evaluation
Modern smartphones make maintenance scheduling effortless. Create recurring reminders that sync across devices. For maximum effectiveness, schedule reminders for specific times when you’ll have 10-15 minutes available - Saturday morning, Sunday evening, or whenever your typical cleaning routine occurs. Generic reminders (“Check vacuum filter”) get ignored; specific ones (“Clean vacuum filter - takes 5 minutes”) get completed.
Consider seasonal adjustments. Spring and fall typically demand more vacuuming due to pollen, leaves, and seasonal shedding from pets. Schedule extra maintenance checks during these high-use periods. After holiday gatherings with extra guests and foot traffic, perform an extra deep-clean cycle to address the increased debris accumulation.
Keep Maintenance Supplies Stocked
Essential Supplies:
- Replacement filters (buy in bulk)
- Spare belts
- Cleaning cloths
- Compressed air
- Mild soap
Proactive supply stocking prevents “I’ll do it later” procrastination. When you discover a worn belt but lack a replacement, the vacuum sits unused while you order parts. Keep at least one complete set of replacement parts on hand: two filters, two belts, and any model-specific components like brush rolls or seals.
Buy filters in multipacks for 20-40% savings. Multipacks typically offer 20-40% savings compared to buying individual filters. Belts also come in multipacks, often with six belts for the price of three. Store supplies near the vacuum in a labeled container so family members can find them easily. This encourages others to help with maintenance rather than leaving everything to one person.
Maintenance Log
Track in notes app or spreadsheet:
- Date of filter changes
- Belt replacements
- Professional services
- Issues and resolutions
This helps identify patterns and predict needs.
Maintenance logging provides valuable data over time. Track the date and hours of use when replacing belts - if belts consistently fail at 100 hours, you can proactively replace at 90 hours before failure occurs during cleaning. Note which issues occurred and how they were resolved; similar symptoms in the future get diagnosed faster based on historical data.
For multi-vacuum households, maintain separate logs for each unit. This is particularly important for families with primary vacuums for different floors or purposes. When one vacuum shows reliability issues, logs help determine if problems are user-related (affects all vacuums) or unit-specific (affects one vacuum).
Digital logs sync across devices and can’t be lost like paper logs. Create a simple spreadsheet with columns for date, action performed, cost, time spent, and notes. Annual reviews of this log reveal true ownership costs and inform replacement timing decisions.
Further Reading
- How to Vacuum Stairs: The Complete Guide (2026)
- Why Does My Vacuum Smell? 8 Causes & Fixes [2026]
- How Often Should You Vacuum? Complete Guide by Floor Type & Lifestyle
Extending Vacuum Lifespan: Advanced Tips
Proper Storage Practices
Store vacuums in climate-controlled spaces where temperature and humidity remain relatively stable. Extreme temperature swings cause plastic components to become brittle, rubber seals to crack, and lubricants to thicken or separate. Avoid storing vacuums in direct sunlight - UV exposure degrades plastic housings and rubber components over time.
Hang hoses rather than coiling them tightly if possible. Tight coiling creates permanent bends that become weak points prone to cracking. If you must coil hoses, use loose coils and alternate the coil direction periodically to prevent set-in bends. Wrap cords loosely rather than tightly around cord hooks - excessive tension on wrapped cords damages internal wires over years of storage.
Using Vacuums Within Design Limits
Vacuums have design limitations that should be respected. Don’t use household vacuums for construction cleanup - fine drywall dust and concrete particles destroy motors and clog filters beyond cleaning. Don’t vacuum water with non-wet/dry models - water damages motors immediately. Don’t run vacuums continuously for hours; most household models are designed for 20-30 minute sessions with cooling breaks between uses.
Match vacuum tools to tasks. Using the floor head on delicate curtains can damage both. Using the crevice tool on large floor areas wastes time and works the motor unnecessarily. Using cordless vacuums for whole-house cleaning when they’re designed for quick spot cleaning drains batteries rapidly and shortens lifespan.
Environmental Considerations
Regular maintenance has environmental benefits beyond vacuum longevity. Extending a vacuum’s life from 5 to 12 years through maintenance keeps 5-20 pounds of plastic, metal, and electronic components out of landfills. Motors contain copper, permanent magnets, and electrical components that are environmentally costly to produce - maximizing their useful life reduces environmental impact.
Clean filters improve home air quality while reducing energy consumption. A vacuum operating with clean filters uses 15-25% less electricity than one with clogged filters - this savings accumulates meaningfully over years of use. For households running vacuums multiple times weekly, this can save 20-40 kWh annually, reducing both costs and carbon footprint.
When vacuums finally reach end-of-life, investigate recycling options rather than trash disposal. Many manufacturers offer recycling programs for their products. Electronics retailers often accept small appliances for recycling. These programs recover valuable materials like copper and rare earth magnets while properly handling hazardous components like batteries.
Continue Reading
Explore more maintenance & floor care content or browse our other categories.
Frequently Asked Questions
- How often should I service my vacuum?
- DIY maintenance should happen weekly (filters), monthly (deep clean), and annually (thorough inspection). Professional service is recommended annually for premium vacuums or when issues arise. Budget vacuums may not justify professional service - consider replacement instead. Robot vacuums need sensor cleaning weekly and brush maintenance monthly. The key is consistent attention rather than waiting for problems.
- Can I repair my vacuum myself?
- Many maintenance tasks are DIY-friendly: filter replacement, brush roll cleaning, hose clearing, and belt replacement (on most uprights). However, electrical repairs, motor work, and internal component replacement should be left to professionals - vacuum motors can hold electrical charges, and improper repair creates safety hazards. If you're not comfortable with basic mechanical tasks, professional service is worth the cost for peace of mind.
- Why does my vacuum smell bad?
- Vacuum odors typically come from: (1) Full bag/bin with organic material decaying - empty immediately; (2) Clogged filters trapping odors - clean or replace; (3) Something sucked up that's stuck in the hose - check for blockages; (4) Pet hair and dander buildup - clean all components thoroughly; (5) Overheating motor - stop using and have serviced. To prevent odors: empty after each use, clean filters monthly, and occasionally vacuum baking soda to deodorize the system.
- How long should a vacuum last?
- With proper maintenance, vacuum lifespan varies by quality: Budget vacuums ($100-200) typically last 3-5 years; mid-range ($200-500) last 5-7 years; premium ($500+) can last 10-20 years. The difference is maintenance - regular filter changes, belt replacements, and cleaning can double a vacuum's lifespan. Commercial-grade vacuums (SEBO, Miele) with professional servicing can last 15-20+ years. Poor maintenance can kill any vacuum in 2-3 years regardless of original quality.
- Is professional vacuum service worth it?
- Professional service is worth it for premium vacuums ($400+) and when you lack time/confidence for DIY maintenance. For a $1,000 Miele or SEBO, $100 annual professional service extends lifespan significantly, making it cost-effective. For budget vacuums under $300, professional service rarely makes financial sense - put that money toward a replacement. Professional service shines when dealing with electrical issues, motor problems, or when DIY maintenance hasn't restored performance. It's also valuable for warranty work requiring authorized service documentation.
- What's the most important maintenance task?
- Filter cleaning and replacement represents the single most impactful maintenance task. Clogged filters cause 70-80% of vacuum performance issues, yet they're the easiest to address. Set a weekly reminder to check filters, and replace them at the first sign of discoloration or damage. This one habit prevents motor strain, maintains suction power, protects air quality, and extends overall vacuum lifespan more than any other maintenance activity. If you only have time for one regular maintenance task, make it filter care.
Written By
Home Vacuum Zone
Our team researches, tests, and reviews vacuum cleaners to help you make confident buying decisions.
Related Articles
How to Clean and Maintain a Robot Vacuum: Complete Guide
Learn how to clean your robot vacuum properly. Step-by-step guide covers dustbin emptying, filter cleaning, brush roll maintenance, sensor care, and dock maintenance.
5 Best Steam Mops for Hardwood Floors (2026 Reviews)
Find the best steam mop for hardwood floors in 2026. Our top picks include safe, effective options from Bissell, Shark, and PurSteam with adjustable steam settings.

How Often Should You Vacuum? Complete Guide by Floor Type & Lifestyle
Learn exactly how often to vacuum based on your home's traffic, pets, allergies, and floor type. Get personalized recommendations and discover the best vacuums for your specific needs.