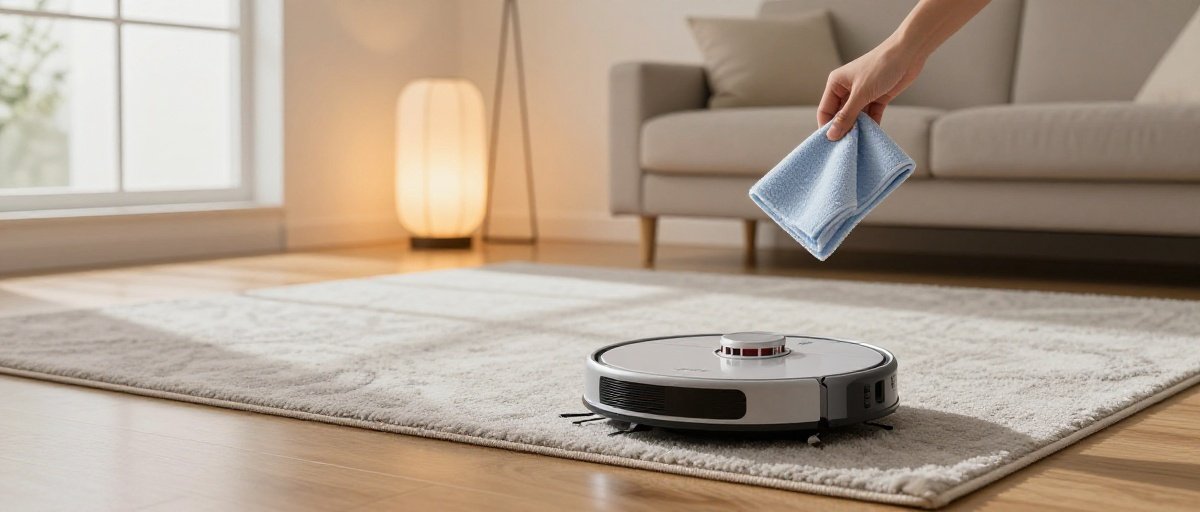
Affiliate Disclosure:Home Vacuum Zone is reader-supported. When you buy through links on our site, we may earn an affiliate commission at no additional cost to you. This does not influence our reviews or recommendations — we only recommend products we genuinely believe in.
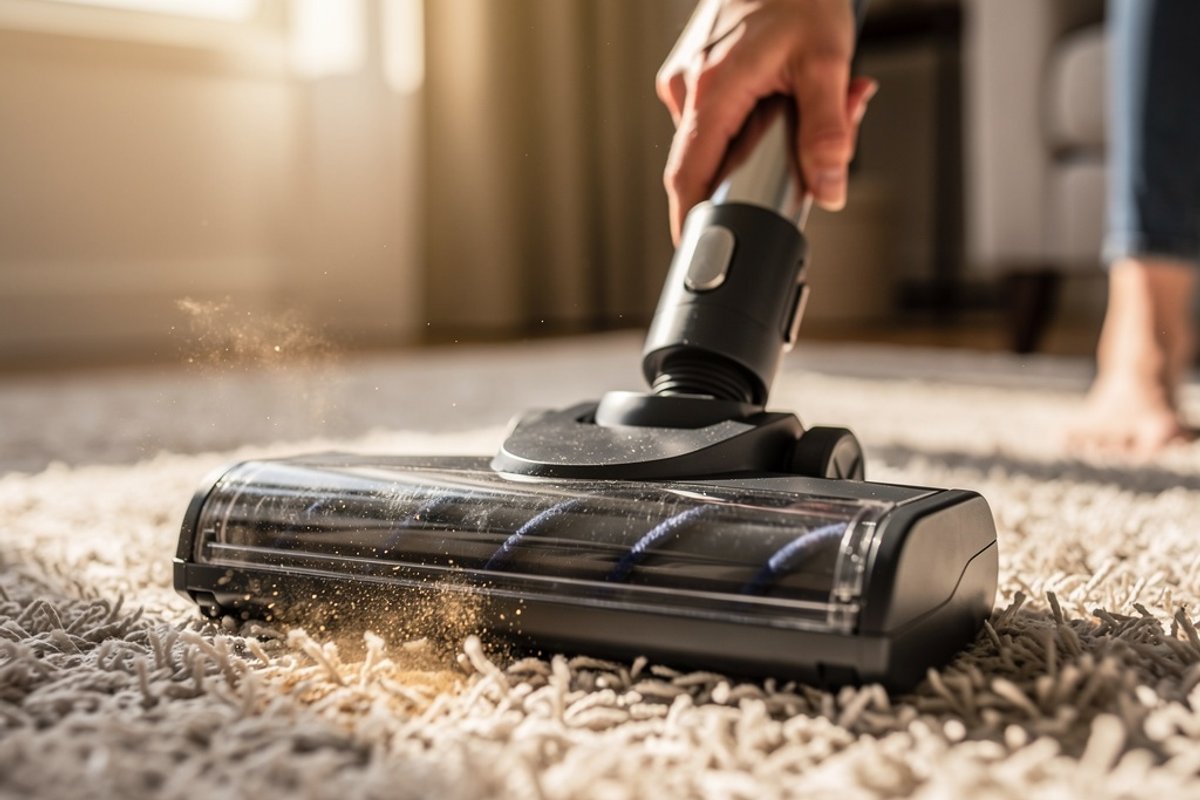
A vacuum brush roll that stops spinning is one of the most common vacuum problems - and one of the easiest to fix yourself. Whether your vacuum has lost suction entirely or the brush simply won’t turn, this guide will walk you through diagnosing and repairing the issue in 15 minutes or less.
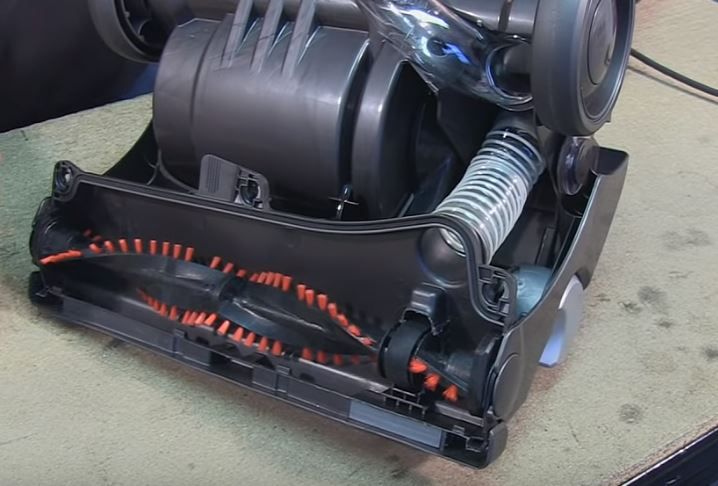
The brush roll (also called a beater bar or agitator) is the rotating cylinder with bristles that sweeps debris from your carpet into the vacuum’s airflow. When it stops spinning, your vacuum loses 50-70% of its cleaning effectiveness on carpet surfaces. The good news? Most brush roll failures stem from simple issues you can resolve without professional help or specialized tools.
Quick Verdict: Most brush roll failures are simple fixes: tangled hair (5-10 min cleanup), a worn belt (10-15 min replacement), or blocked suction from clogs. The Dyson V15 and Shark Stratos feature tangle-free brush rolls that prevent the #1 cause of brush roll failure. For budget vacuums, monthly preventative cleaning extends brush roll life significantly.
Quick Diagnostic Checklist
Before diving into repairs, identify your specific problem:
If the brush won’t spin but suction is normal: → Likely a belt or brush roll issue (Fixes 1-3)
If suction is weak or lost: → Likely a clog, filter, or bag issue (Fixes 1, 4)
If you hear a burning smell: → Stop immediately! Belt is likely stuck or broken
If the brush spins but doesn’t touch the carpet: → Height adjustment issue or worn bristles
If you hear clicking or grinding: → Debris caught in brush roll or damaged bearings
Take a moment to observe what happens when you turn on your vacuum. Does the brush attempt to spin then stop? Is it completely motionless? Can you hear the motor straining? These observations will help you pinpoint the exact cause and skip unnecessary troubleshooting steps.
Understanding Your Vacuum’s Brush Roll System
Before attempting repairs, it helps to understand how the brush roll works. In most upright vacuums, an electric motor drives a rubber belt that connects to the brush roll spindle. As the motor spins, the belt rotates the brush roll at high speed (typically 3,000-6,500 RPM). This rapid rotation allows the bristles to agitate carpet fibers, loosening embedded dirt and pet hair.
Different vacuum types use different drive systems:
Direct Drive (Newer Dyson, Shark): No belt at all - the motor powers the brush roll directly. These systems rarely fail but cost more to repair when they do.
Belt Drive (Most Uprights): A replaceable rubber belt connects the motor to the brush roll. Belts are inexpensive but require regular replacement.
Gear Drive (Commercial Vacuums): Metal or plastic gears transfer power to the brush roll. More durable than belts but can strip or break under stress.
Clutch Systems (Premium Models): Automatically disengage the brush when obstructed, protecting the motor and belt. If your vacuum has a clutch, it may need resetting after clearing a jam.
Knowing your system type helps you understand what might fail and how to fix it. Check your owner’s manual or the manufacturer’s website to confirm your vacuum’s drive type.
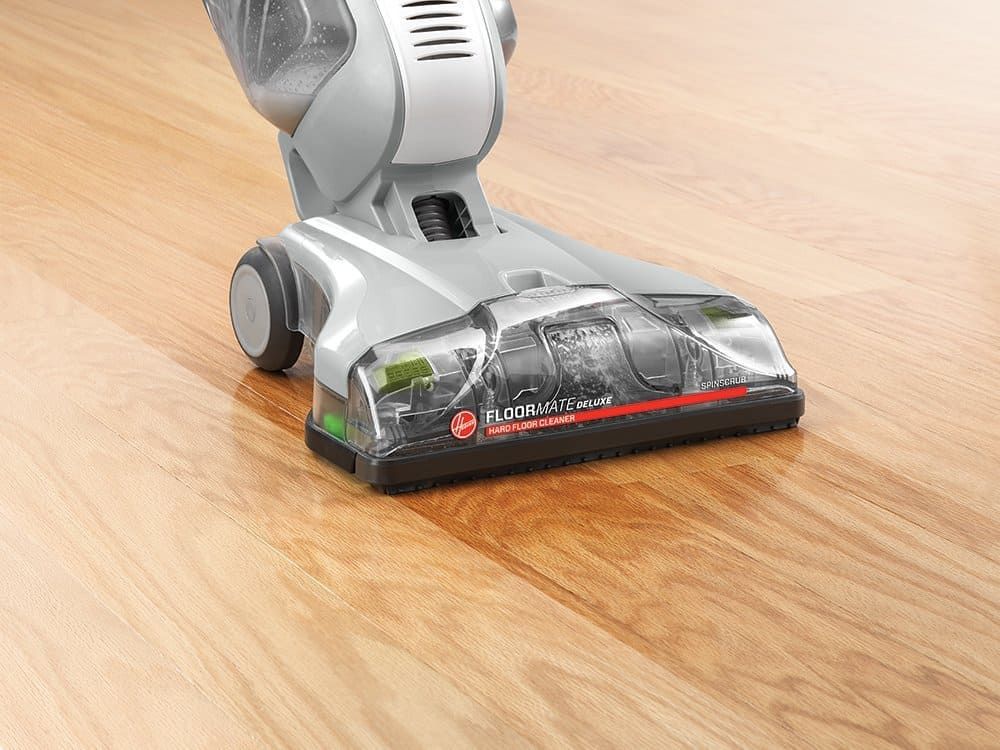
Fix #1: Remove Hair and Debris (5-10 minutes)
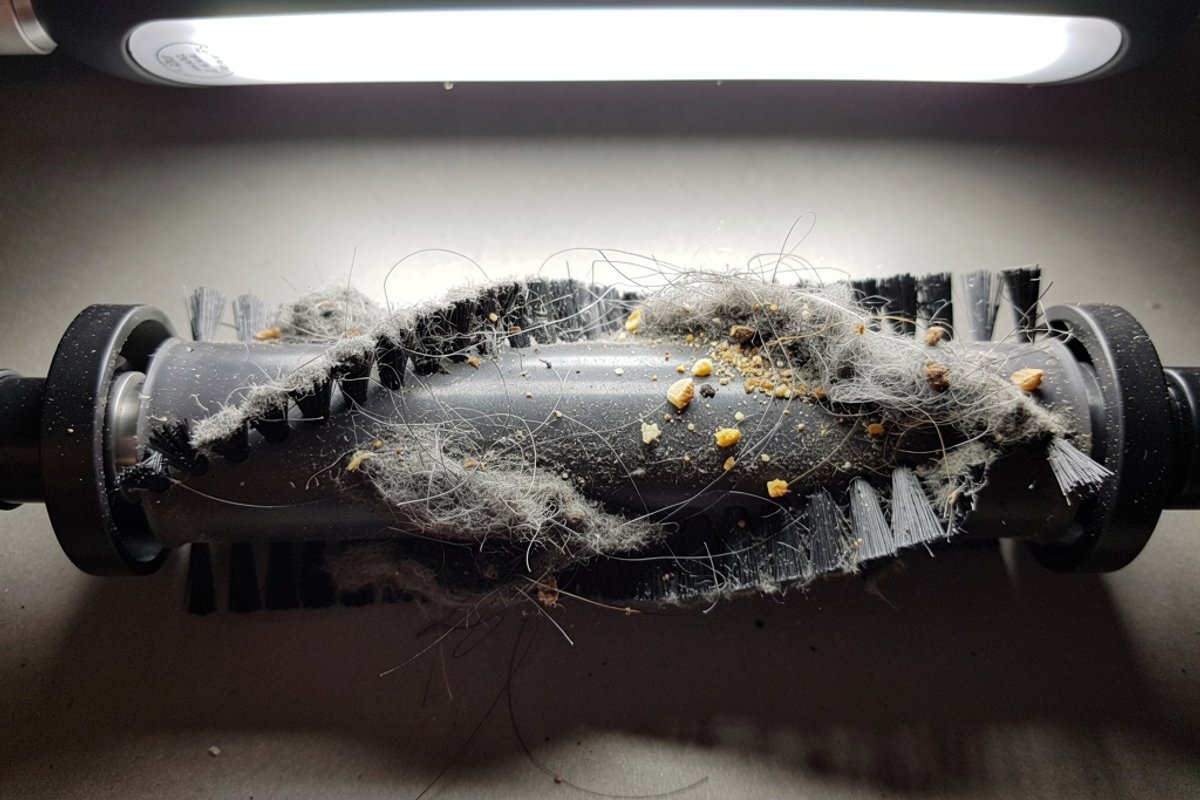
Hair and fibre wrapped around the roller is the most common cause of brush roll failure. It’s also the easiest fix.
Hair accumulation doesn’t just slow the brush - it can completely seize it. A single long hair strand can wrap hundreds of times around the roller in just a few vacuuming sessions. Add pet hair, carpet fibers, thread, and dental floss, and you create a tight mat that prevents rotation. In severe cases, this resistance can burn out motors or snap belts.
What You’ll Need:
- Scissors or seam ripper
- Cleaning tool or old toothbrush
- Garbage bag
- Needle-nose pliers (optional, for stubborn debris)
- Work gloves (optional, for cleanliness)
Step-by-Step:
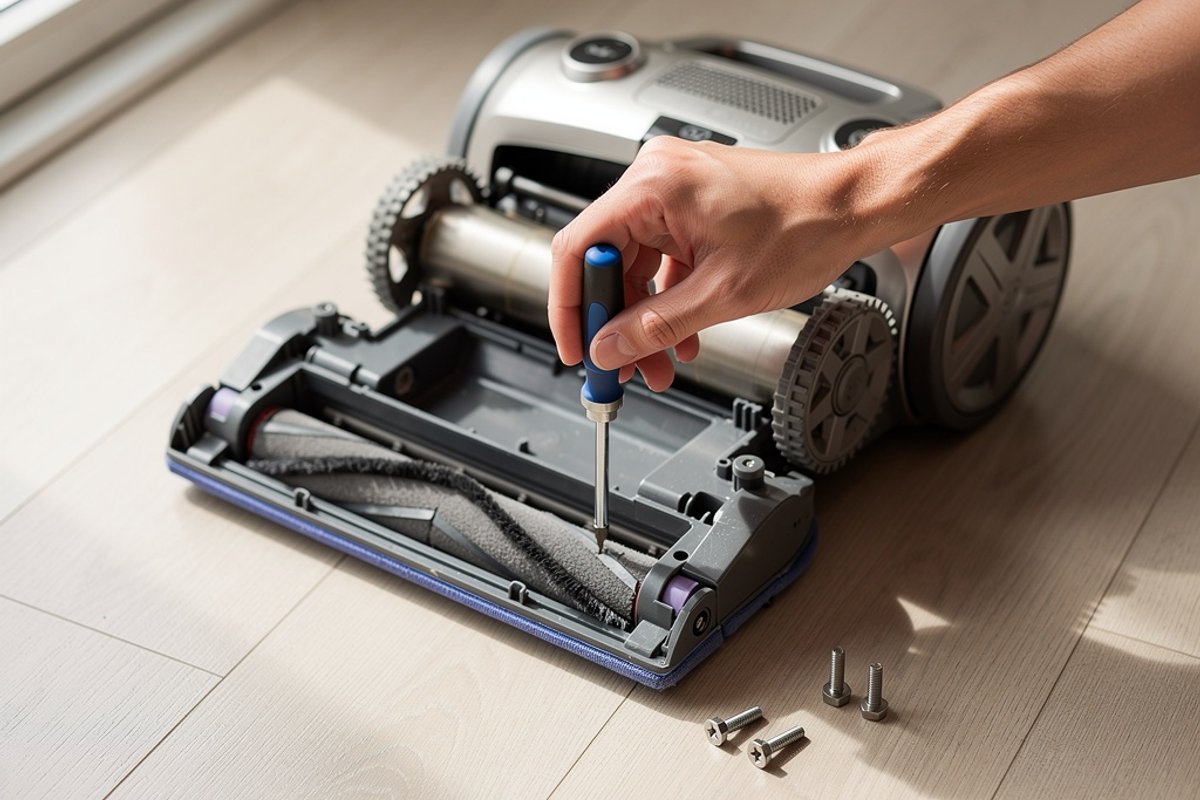
Step 1: Access the Brush Roll
- Unplug the vacuum completely (this is a safety requirement, not a suggestion)
- Lay the vacuum on its back on a towel or old sheet
- Remove the bottom plate (usually 3-5 screws)
- Some models have tool-free release clips - check both sides of the vacuum head
- Keep screws in a small bowl to prevent losing them
Step 2: Remove the Brush Roll
- Lift out the brush roll assembly
- Note how it fits - you’ll need to reinstall it the same way
- On some models, you’ll need to unhook the belt first (slide it off one end)
- Take a photo with your phone before disassembly if you’re unsure about reassembly
Step 3: Cut Away Hair and Fibers
- Work scissors along the brush roll length
- Cut through wrapped hair and carpet fibers in sections
- Start at one end and work toward the other
- Pull debris away in sections as you cut
- Be careful not to cut the bristles themselves
- For stubborn tangles, use a seam ripper to work under the mat
Step 4: Clean Thoroughly
- Use a toothbrush to clean bristles individually
- Check both end caps for hair buildup - this is where jams often start
- Remove any debris from the brush housing with a vacuum attachment
- Inspect the belt area for accumulated lint and dust
- Wipe down the brush roll with a damp cloth if needed
Step 5: Reinstall and Test
- Place brush roll back in housing, ensuring the belt is properly seated
- Ensure it spins freely by hand before closing
- The brush should rotate smoothly with minimal resistance
- Reattach bottom plate, tightening screws evenly (don’t overtighten)
- Test vacuum on carpet, listening for normal operation
Pro Tip: Check and clean your brush roll monthly if you have pets or long-haired family members. Prevention is easier than repair. Set a recurring reminder on your phone to inspect the brush roll. A five-minute monthly cleaning prevents the hour-long repair session when the brush completely seizes.
Special Considerations for Pet Owners
Pet hair creates unique challenges for brush rolls. Dog and cat hair is finer than human hair and tends to wind more tightly around the roller. It also accumulates faster - households with shedding pets may need to clean the brush roll weekly during shedding season.
Consider these pet-specific tips:
- Vacuum high-traffic pet areas more slowly: This gives the brush roll time to lift hair without overwhelming it. A vacuum designed for pet hair can help reduce tangling
- Use the hose attachment first on furniture: This prevents transferring massive amounts of pet hair to the floor
- Brush pets regularly outdoors: Less loose hair in your home means less in your vacuum
- Consider a vacuum with a self-cleaning brush roll: Models like the Shark Vertex feature brush rolls that actively prevent hair wrap
Fix #2: Replace the Belt (10-15 minutes)
If the brush roll is clean but still won’t spin, the drive belt is likely stretched, broken, or slipped off.
Vacuum belts are designed as wear items - they’re meant to be replaced regularly. Even if your belt hasn’t broken, it stretches over time. A stretched belt can’t maintain proper tension, causing the brush roll to spin slower or not at all. Heat, humidity, and normal use all contribute to belt degradation.
What You’ll Need:
- Replacement belt (check your vacuum model number)
- Screwdriver
- Flashlight
- Towel or old sheet
Step-by-Step:
Step 1: Locate the Belt
- Most belts are accessible after removing the bottom plate
- Some uprights require removing the brush roll first
- Canister vacuums may have the belt in the power head
- Refer to your owner’s manual for belt location - some models hide belts under additional covers
Step 2: Remove the Old Belt
- Note the belt path before removal - take a photo if helpful
- Stretch and slide off the motor pulley (the smaller wheel)
- Remove from brush roll spindle
- Discard the old belt
- Compare the old belt to the new one to verify you have the correct replacement
Step 3: Inspect Components
- Check motor pulley for damage, cracks, or excessive wear
- Ensure brush roll spindle spins freely without wobbling
- Clean any debris from belt path - accumulated lint prevents proper belt seating
- Look for signs of melted rubber (indicates previous belt was slipping)
- Check the motor shaft for smoothness - rough spots will damage the new belt
Step 4: Install New Belt
- Loop new belt around motor pulley first (the smaller wheel)
- Stretch and loop around brush roll spindle (the larger wheel)
- Ensure belt is seated in grooves on both pulleys
- The belt should sit flat, not twisted
- Rotate the brush roll by hand several times to ensure proper tracking
Step 5: Reassemble and Test
- Reinstall brush roll (belt will stretch slightly as you do this - that’s normal)
- Check belt tension - it should be taut but not overly tight
- There should be minimal slack (less than 1/4 inch of play)
- Reattach bottom plate, ensuring no wires are pinched
- Run vacuum on carpet to ensure brush spins at full speed
- Listen for normal operation - squealing indicates improper installation
Common Mistakes to Avoid:
- Installing belt twisted (causes immediate failure and squealing)
- Overtightening screws (cracks plastic housing and strips threads)
- Using generic belts (may not fit correctly or have wrong tension)
- Failing to clean debris before installing new belt (causes premature failure)
- Forcing the belt rather than stretching it properly (damages belt and pulleys)
Belt Replacement by Brand:
Understanding brand-specific quirks saves time and prevents damage during belt replacement.
Dyson:
- Most cordless models: No belt (direct drive motor)
- Ball uprights: Access through bottom plate, may require removing cyclone assembly
- DC-series: Belt hidden in gear assembly, more complex replacement
- Some models use a flat belt instead of round - verify before ordering
Shark:
- Navigator series: Bottom plate removal, straightforward access
- Rotator series: Tool-free brush roll access via release buttons
- Lift-Away: Check both floor nozzle and canister attachments
- Many models use proprietary belts - aftermarket belts often fail quickly
Bissell:
- CleanView: Standard bottom plate access, usually 4-6 screws
- Pet Hair Eraser: Often tool-free release with rotating clips
- PowerForce: Remove 4-5 bottom screws, belt visible immediately
- CrossWave models: No traditional belt (wet/dry design)
Hoover:
- WindTunnel: Bottom plate with 4 screws, may have belt access door
- WindTunnel 2/3: Some models have belt access window for quick changes
- React series: Similar to Shark design with easy access
- Commercial models: Heavy-duty belts that last longer but cost more
Miele:
- Canister models: Belt located in power nozzle (separate unit)
- Requires specialized tools on some models
- High-quality belts that last 12-18 months typically
- Consider professional service for expensive models under warranty
Choosing the Right Replacement Belt
Not all vacuum belts are created equal. Here’s what to look for:
OEM (Original Equipment Manufacturer) vs. Aftermarket:
- OEM belts fit perfectly and last as long as the original
- Aftermarket belts are cheaper but may stretch faster or have incorrect dimensions
- For vacuums under warranty, use OEM belts to avoid warranty issues
Belt Material:
- Standard rubber: Most common, adequate for typical use
- Reinforced rubber: Lasts longer, resists heat better
- Geared belts: Used in some high-end models, don’t slip under load
- Stretch belts: Easier to install but may not last as long
Belt Width and Thickness:
- Too narrow: Slips off pulleys easily
- Too thick: Won’t seat properly, causes excessive motor strain
- Always match specifications exactly
Purchase belts in multi-packs when possible. Having spare belts on hand means you can fix a broken belt immediately rather than waiting for shipping. Store spare belts in a cool, dry place away from direct sunlight - heat and UV light degrade rubber even in storage.
Fix #3: Replace the Brush Roll (15-20 minutes)
If the brush roll is damaged or worn, replacement may be necessary.
Brush rolls don’t last forever. The bristles wear down from contact with carpet fibers, especially on high-pile or berber carpets. The end caps can crack from stress and debris accumulation. The internal bearings can seize from lack of lubrication or damage from debris. Knowing when to replace versus clean is key to maintaining vacuum performance.
Signs You Need a New Brush Roll:
- Bristles worn down to less than 1/4 inch (can’t reach deep into carpet fibers)
- Cracked or broken end caps (brush won’t seat properly)
- Brush roll won’t spin freely even with belt removed (seized bearings)
- Loud grinding noise when spinning (damaged internal components)
- Visible warping or bending of the roller tube
- Missing sections of bristles (creates imbalanced spinning)
- Brush roll bristles permanently matted down (can’t be cleaned back to original state)
What You’ll Need:
- Replacement brush roll (specific to your model number)
- Screwdriver
- Towel or work surface
Step-by-Step:
Step 1: Remove Old Brush Roll
- Follow Fix #1 steps to access brush roll
- Remove belt from brush roll spindle (slide it off carefully)
- Lift out old brush roll, noting orientation
- Some models have clips or brackets holding the brush - release these first
- Check for any washers or spacers that may fall out during removal
Step 2: Compare Old and New
- Verify new brush roll matches exactly in length and diameter
- Check bristle pattern and end cap design (they should be identical)
- Confirm spindle diameter matches (too small means loose fit, too large won’t install)
- Verify bristle material matches (soft for hard floors, stiff for carpets)
- Check that bristle arrangement is identical (some have specific patterns for different carpet types)
Step 3: Install New Brush Roll
- Place in housing with belt attached to spindle
- Ensure end caps seat properly in mounting brackets
- Rotate brush roll by hand to verify it spins freely
- Check both end caps for secure seating (loose caps cause wobbling)
- Verify no parts were left out during installation
Step 4: Reassemble
- Reinstall bottom plate, aligning all clips and holes
- Tighten screws evenly in a cross pattern (prevents warping)
- Double-check belt tension and alignment
- Test on carpet surface, listening for smooth operation
- Observe cleaning performance - new brush should show immediate improvement
Brush Roll Types and Technologies
Modern vacuums use several brush roll designs, each with specific advantages:
Traditional Bristle Brush:
- Best for: Standard carpets, general cleaning
- Lifespan: 1-3 years depending on use
- Pros: Inexpensive, widely available, effective on most surfaces
- Cons: Bristles wear down, prone to hair tangling
Rubber Blade Brush:
- Best for: Pet hair, hard floors transitioning to carpet
- Lifespan: 3-5 years (rubber lasts longer than bristles)
- Pros: Doesn’t tangle with hair, flexible blades conform to surfaces
- Cons: Less effective on deep pile carpet, can leave marks on some hard floors
Dual Brush Systems:
- Best for: Versatile cleaning across multiple surface types
- Lifespan: Varies by component
- Pros: One soft brush for hard floors, one stiff for carpet
- Cons: More complex, both brushes must be maintained
Self-Cleaning Brush Rolls:
- Best for: Pet owners, long-haired households
- Lifespan: 2-4 years (mechanism eventually wears)
- Pros: Actively prevents hair wrap, reduces maintenance
- Cons: More expensive to replace, proprietary designs
When selecting a replacement brush roll, consider upgrading to a premium option if your vacuum supports it. The modest extra investment in a better brush roll can significantly improve cleaning performance and reduce future maintenance.
Fix #4: Restore Lost Suction (5-15 minutes)
If your vacuum isn’t picking up debris despite the brush spinning, you have a suction problem.
Suction and brush roll action work together - the brush agitates debris from carpet fibers, and suction pulls it into the vacuum. When suction fails, even a perfectly functioning brush roll can’t clean effectively. Lost suction typically results from blockages in the airflow path or filtration system failures.
Common Causes of Lost Suction:
1. Full Bag or Dustbin (2 minutes)
- Bagged vacuums: Replace bag when 2/3 full (airflow drops significantly after this point)
- Bagless vacuums: Empty dustbin when it reaches the “max fill” line
- Check for bag blockage from improper installation (bag not properly secured to intake port)
- Verify the bag or dustbin seal is intact - air leaks reduce suction dramatically
- For bagged models, ensure the bag collar is properly attached to the intake
Even if the bag or bin looks half full, it may be blocked. Fine dust can create a solid layer that prevents airflow even when there’s visible space remaining. When in doubt, replace the bag or empty the bin.
2. Clogged Filter (3-5 minutes)
- Locate all filters - most vacuums have 2-3 filters in different locations
- Tap out loose debris over a trash can
- Wash if washable (check manual for specific instructions)
- Allow washable filters to dry completely (24-48 hours) before reinstalling
- Replace if worn, torn, or heavily discolored
- Never vacuum without filters installed - debris damages the motor
Filters are designed to trap microscopic particles, which means they clog gradually. A clogged filter reduces suction by 40-60% even if it doesn’t look particularly dirty. Check filters monthly and clean or replace according to the manufacturer’s schedule.
3. Blocked Hose (5-10 minutes)
- Detach hose from vacuum at both ends
- Shine flashlight through one end - light should pass through clearly
- Use a straightened coat hanger or plumber’s snake to clear clogs
- Push obstructions out from the opposite end (don’t pull them deeper)
- Check hose for cracks, tears, or damage that creates air leaks
- Flex the hose while inspecting - cracks may only be visible when bent
Common hose blockages include: socks, paper, plastic bags, small toys, and compacted pet hair. Sometimes items lodge at bends or narrowed sections. If you can’t clear the blockage with a coat hanger, you may need to replace the hose.
4. Obstructed Air Path (5-10 minutes)
- Check intake port where floor nozzle attaches to the main unit
- Inspect wand for blockages (detach and look through it)
- Look for objects stuck in brush roll housing
- Examine the transition between dustbin and filter area
- Check exhaust vents - blocked exhaust also reduces suction
- Verify all gaskets and seals are intact
Air must flow continuously from the intake through the filter system to the exhaust. A blockage anywhere in this path reduces overall suction. Inspect the entire airflow pathway systematically, starting at the floor nozzle and working back toward the motor.
Filter Maintenance by Type:
Different filter types require different maintenance approaches:
Foam Filters:
- Wash every 3 months under warm running water
- Use mild dish soap if heavily soiled
- Squeeze out excess water (don’t wring or twist)
- Air dry completely before reinstalling (48 hours in humid climates)
- Replace annually or when foam begins to deteriorate
- Never put foam filters in the dishwasher or dryer
HEPA Filters:
- Most are NOT washable (water destroys filtration properties)
- Replace every 6-12 months depending on use
- Tap out debris monthly to extend life
- Check manufacturer specs - some newer HEPA filters are washable
- Washable HEPA filters need 24-48 hours drying time
- Consider allergies when timing replacement - pollen season demands fresh filters
Pleated Paper Filters:
- Do NOT wash (water causes permanent damage)
- Replace every 3-6 months for optimal performance
- Tap out debris monthly against the inside of a trash can
- Never use compressed air (damages pleats)
- Inspect for tears or damage during cleaning
- Replace immediately if you see tears or discoloration
Disc Filters (Dyson, some Shark models):
- Washable but require careful handling
- Rinse monthly under cold water only
- Tap out gently - don’t beat or strike hard surfaces
- Allow 24 hours minimum drying time
- Replace when color changes significantly (purple turns gray/brown)
- Never use detergents or hot water
Advanced Suction Troubleshooting
If you’ve checked bags, bins, filters, and hoses but suction remains weak, consider these less common issues:
Cracked Housing or Seals: Air leaks from cracked plastic reduce suction even if the crack is small. Inspect the entire vacuum body, especially around seams and joints. You can often hear air leaking as a whistling sound. Small cracks can be sealed with appropriate plastic adhesive or epoxy.
Motor Filter Blockage: Some vacuums have a final filter protecting the motor itself. This filter is often hidden and overlooked during maintenance. Check your manual for location - it’s typically near the motor housing. A blocked motor filter can reduce suction to near zero.
Thermal Cutoff Activation: Many vacuums have a thermal switch that cuts power if the motor overheats. Overheating usually results from blockages that force the motor to work harder. If your vacuum keeps shutting off, let it cool for 30-45 minutes, then check for blockages before restarting.
Cyclone Separation Issues (Bagless Models): The cyclonic action in bagless vacuums depends on proper airflow geometry. If you’ve recently cleaned the dustbin, verify the cyclone assembly is properly seated. Misaligned cyclones reduce separation efficiency and allow dust to reach filters faster.
When to Call a Professional
Some vacuum problems require professional repair. For a broader troubleshooting reference, see our vacuum repair ultimate DIY guide.
Motor Failure Signs:
- Burning smell that persists after belt replacement and clearing all blockages
- Vacuum turns on but produces no suction or brush movement
- Loud grinding or screeching from motor compartment (not the brush area)
- Intermittent power loss or motor cutting out randomly
- Visible sparks from motor vents (stop using immediately)
- Motor runs but sounds significantly different (higher or lower pitch)
Motor replacement can be a significant expense depending on the vacuum model, often approaching or exceeding the cost of a budget vacuum. For less expensive vacuums, motor repair rarely makes economic sense.
Electrical Issues:
- Power cord damage exposing wires (electrical hazard)
- Switch failures requiring internal wiring repair
- Circuit board damage (common after moisture exposure)
- Charging system failure (cordless models)
Electrical repairs require specialized knowledge and tools. Attempting DIY electrical repairs on vacuums can create safety hazards and void warranties.
Cost-Benefit Analysis:
- Minor repairs: Usually worth it for mid-range and premium vacuums
- Moderate repairs: Consider vacuum age (replace if 5+ years old)
- Major repairs: Usually better to replace unless it’s a premium model (Miele, Dyson, SEBO)
- Warranty coverage: Always use warranty for covered repairs
For premium vacuum brands designed to last 15-20 years with maintenance (Miele, SEBO, Riccar), professional repair makes sense even for expensive fixes. For budget models, replacement is typically more economical than repair.
Further Reading
- Why Does My Vacuum Smell? 8 Causes & Fixes [2026]
- How to Deodorize and Vacuum Carpet With Baking Soda - Step-by-Step Guide
- How to Vacuum Stairs: The Complete Guide (2026)
Preventive Maintenance Schedule
Avoid future problems with regular maintenance:
Weekly:
- Empty dustbin or check bag level (never let bags exceed 2/3 full)
- Remove visible hair from brush roll ends
- Quick filter tap-out (especially in dusty environments)
- Check hose connections for debris
- Inspect power cord for damage
Monthly:
- Deep clean brush roll (complete hair and debris removal)
- Wash foam filters thoroughly
- Inspect belt for wear, cracks, or stretching
- Clean all brush roll housing areas
- Check wheels and swivel mechanisms for debris
- Wipe down exterior and handle grips
Every 3-6 Months:
- Replace or deep clean HEPA filters according to manufacturer schedule
- Check all hoses for cracks or damage
- Clean all attachments thoroughly
- Inspect electrical cord and plug for damage
- Test suction strength and brush performance
- Tighten any loose screws or fasteners
Annually:
- Replace belt (even if not broken - preventive replacement)
- Deep clean entire vacuum inside and out
- Consider professional service for premium models
- Replace worn attachments
- Update or replace filters based on usage
- Inspect and lubricate wheels if applicable
For Pet Owners - Add These Tasks:
- Twice-monthly deep brush roll cleaning during shedding season
- Monthly inspection of intake areas for compacted pet hair
- Quarterly filter replacement instead of semi-annual
- Weekly check of hose for hair blockages
Regular maintenance extends vacuum life by 3-5 years on average. A budget vacuum with proper maintenance can outperform a premium vacuum that receives minimal care. Set recurring reminders on your phone or create a simple maintenance log to track tasks.
Continue Reading
Explore more maintenance & floor care content or browse our other categories.
Frequently Asked Questions
- How often should I replace my vacuum belt?
- Replace your vacuum belt every 6-12 months even if it hasn't broken. Belts stretch over time, reducing brush roll speed and cleaning effectiveness. Signs of a worn belt include: brush roll slowing down, burning rubber smell, or visible stretching/cracking. Keep a spare belt on hand - breakdowns always happen at inconvenient times. High-use environments (large homes, multiple pets, commercial cleaning) should replace belts every 4-6 months. Light use (small apartment, no pets, weekly vacuuming) can extend replacement to 12 months. However, if you notice any performance decrease, replace the belt regardless of time since last replacement.
- Can I use a generic belt in my vacuum?
- While generic belts may fit, OEM (original equipment manufacturer) belts are recommended. Generic belts often stretch faster, break sooner, and may not have the exact dimensions needed for proper tension. The $3-5 savings isn't worth reduced performance and potential damage to your vacuum. Buy genuine belts for your specific model. That said, some reputable aftermarket manufacturers produce quality belts for popular vacuum models. Look for brands with strong reviews and return policies. Avoid ultra-cheap belts (usually sold in 10-packs for $5-10) - these are uniformly poor quality.
- Why does my vacuum brush work on hard floors but not carpet?
- This typically indicates insufficient belt tension or worn brush roll bristles. On hard floors, the brush doesn't need to agitate deeply - suction alone picks up debris. On carpet, the brush must dig into fibers, requiring full belt tension and adequate bristle length. Replace the belt first (cheapest fix), then consider brush roll replacement if the problem persists. Another possibility is incorrect height adjustment. Most vacuums have a height selector that adjusts the nozzle distance from the floor. If set too high for carpet, the brush won't make proper contact. Consult your manual for recommended height settings for different carpet types.
- How do I know if my brush roll or belt is the problem?
- Perform this quick test: Lay the vacuum on its back, remove the bottom plate, and manually spin the brush roll. If it spins freely with minimal resistance, the belt is likely stretched or broken. If it won't spin or grinds, the brush roll bearings may be seized. You can also check belt tension - the belt should feel taut and resist stretching when pulled gently. Listen carefully when you turn on the vacuum. A high-pitched squeal suggests belt slippage. A grinding noise indicates brush roll bearing problems or debris caught in the brush. No brush movement with normal motor sound means complete belt failure.
- Should I repair my vacuum or buy a new one?
- Consider replacement if: your vacuum is over 7 years old, repairs would cost more than 50% of replacement cost, parts are no longer available, or you've already repaired it multiple times. Repair makes sense for: premium vacuums under 5 years old, simple fixes under $50, or sentimental/value reasons (e.g., Miele canisters that last 20+ years with proper maintenance). Calculate total cost of ownership: How much have you invested in repairs over the vacuum's lifetime? If you've spent $150+ in repairs on a $200 vacuum, replacement makes financial sense. However, one $30 repair on a well-maintained vacuum is always worthwhile.
- Why does my vacuum smell like burning rubber?
- A burning rubber smell indicates belt friction from slippage or a jammed brush roll. Stop using the vacuum immediately. Turn it off, unplug it, and check for: hair wrapped around the brush roll, a stretched or misaligned belt, or debris preventing brush rotation. Clear the obstruction, replace the belt if stretched, and test. If the smell persists after these fixes, the motor may be damaged - consult a professional. Continuing to run a vacuum with a burning smell can damage the motor permanently and create a fire hazard. The smell results from rubber heating to 200+ degrees Fahrenheit from friction. This degrades the belt and can melt plastic components.
- Can I vacuum without the brush roll spinning?
- Many vacuums have a brush roll on/off switch for this exact purpose. Disabling the brush for hard floors prevents scattering debris and protects delicate surfaces. However, for carpet cleaning, the brush roll is essential - it provides 50-70% of cleaning effectiveness. If your brush won't spin due to malfunction, you'll get minimal carpet cleaning, though hard floors can still be cleaned effectively. Some vacuum models automatically adjust brush speed based on surface detection. If your vacuum has this feature, trust it to optimize performance. Manual switches give you control but require you to remember to toggle between surface types.
- How can I prevent brush roll tangles?
- Regular maintenance is key. Clean the brush roll every 2-4 weeks depending on hair exposure. Consider these preventive measures: vacuum slowly to allow proper pickup without overwhelming the brush, use a lint roller on furniture before vacuuming, brush pets regularly to reduce shedding, and trim loose carpet fibers that might wrap around the brush. Some vacuums feature anti-tangle technology. Brush rolls with rubber fins (instead of all bristles) resist hair wrapping. Self-cleaning brush rolls use combs or scrapers to remove hair during operation. If tangles are a persistent problem, upgrading to a vacuum with anti-tangle features may be worth the investment.
- What's the difference between a brush roll and an agitator?
- These terms are often used interchangeably, but there's a subtle distinction. "Agitator" traditionally refers to the tall spindle in top-loading washing machines but is also used for upright vacuum brush systems. "Brush roll" specifically describes the rotating cylinder with bristles. In modern vacuum terminology, they mean the same thing - the rotating component that agitates carpet fibers. Some manufacturers use "beater bar" to describe particularly aggressive brush systems designed for deep carpet cleaning. These typically have stiffer bristles and rotate at higher speeds than standard brush rolls.
- Why does my cordless vacuum brush stop spinning after a few seconds?
- Cordless vacuums often have automatic shutoff systems that detect obstructions. If the brush encounters resistance (usually from hair or debris), the vacuum cuts power to prevent motor damage. Clear the obstruction and restart. If this happens repeatedly without obvious blockage, the battery may be depleted - low power can't maintain brush speed under load. Another possibility is overheating protection. Cordless vacuum motors generate significant heat. If used continuously for 15-20 minutes, thermal protection may activate. Allow the vacuum to cool for 30-45 minutes, then resume. This is normal behavior, not a defect.
Written By
Home Vacuum Zone
Our team researches, tests, and reviews vacuum cleaners to help you make confident buying decisions.
Related Articles
How to Clean and Maintain a Robot Vacuum: Complete Guide
Learn how to clean your robot vacuum properly. Step-by-step guide covers dustbin emptying, filter cleaning, brush roll maintenance, sensor care, and dock maintenance.
5 Best Steam Mops for Hardwood Floors (2026 Reviews)
Find the best steam mop for hardwood floors in 2026. Our top picks include safe, effective options from Bissell, Shark, and PurSteam with adjustable steam settings.

How Often Should You Vacuum? Complete Guide by Floor Type & Lifestyle
Learn exactly how often to vacuum based on your home's traffic, pets, allergies, and floor type. Get personalized recommendations and discover the best vacuums for your specific needs.