Affiliate Disclosure:Home Vacuum Zone is reader-supported. When you buy through links on our site, we may earn an affiliate commission at no additional cost to you. This does not influence our reviews or recommendations — we only recommend products we genuinely believe in.
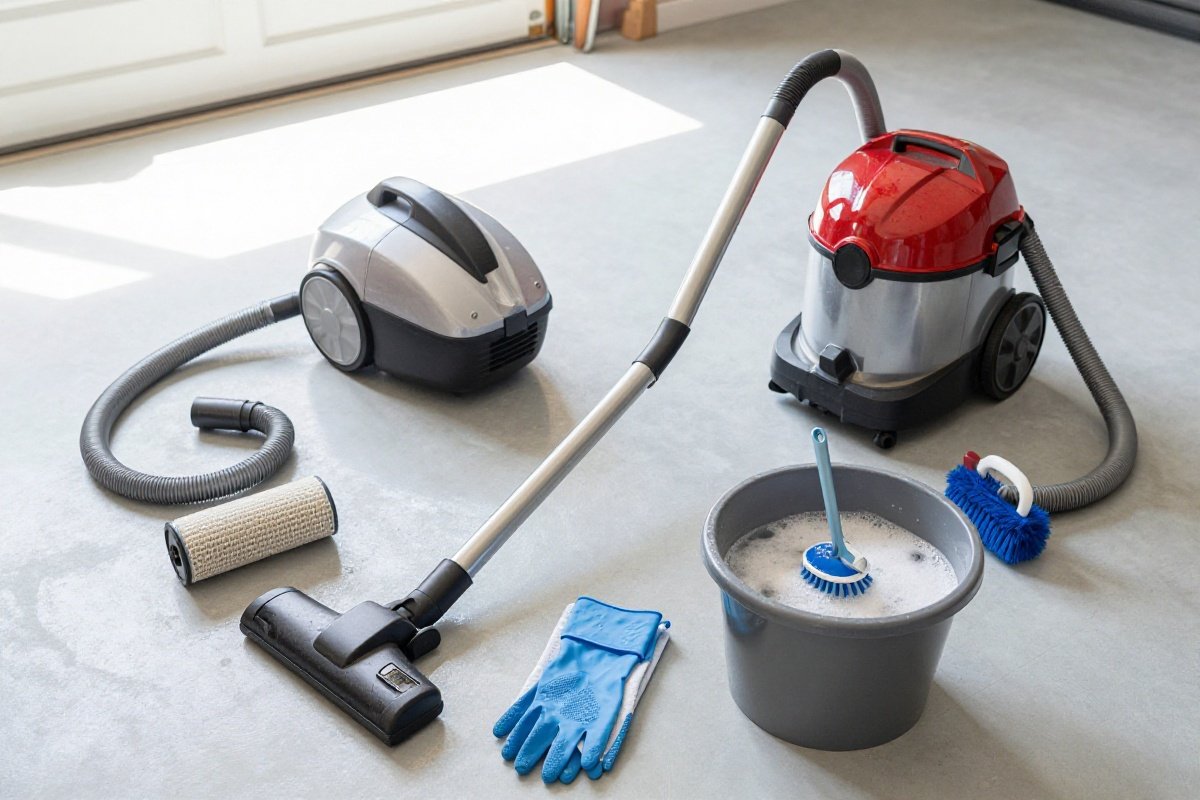
A smelly vacuum cleaner isn’t just unpleasant - it can indicate maintenance issues that affect performance and even damage your machine. Whether your vacuum smells like burning rubber, wet dog, or musty basement, this guide will help you identify the cause and fix it before permanent damage occurs.
Quick Diagnosis: What Your Vacuum Smell Means
| Smell | Likely Cause | Urgency |
|---|---|---|
| Burning rubber | Belt or brushroll issue | High - stop using |
| Electrical burning | Motor or wiring problem | Critical - stop immediately |
| Wet dog/pet odor | Pet hair accumulation | Medium - clean soon |
| Musty/mildew | Moisture/mold | Medium - clean soon |
| Dusty/burnt dust | Overheating or clogged filter | Medium - check filters |
| Rotten/sour | Organic debris in bag/canister | Medium - empty now |
2026 Odor Prevention Best Practices
Regular maintenance is your best defense against vacuum odors. Following these 2026 best practices will keep your machine smelling fresh and performing optimally.
Regular Filter Replacement Schedules
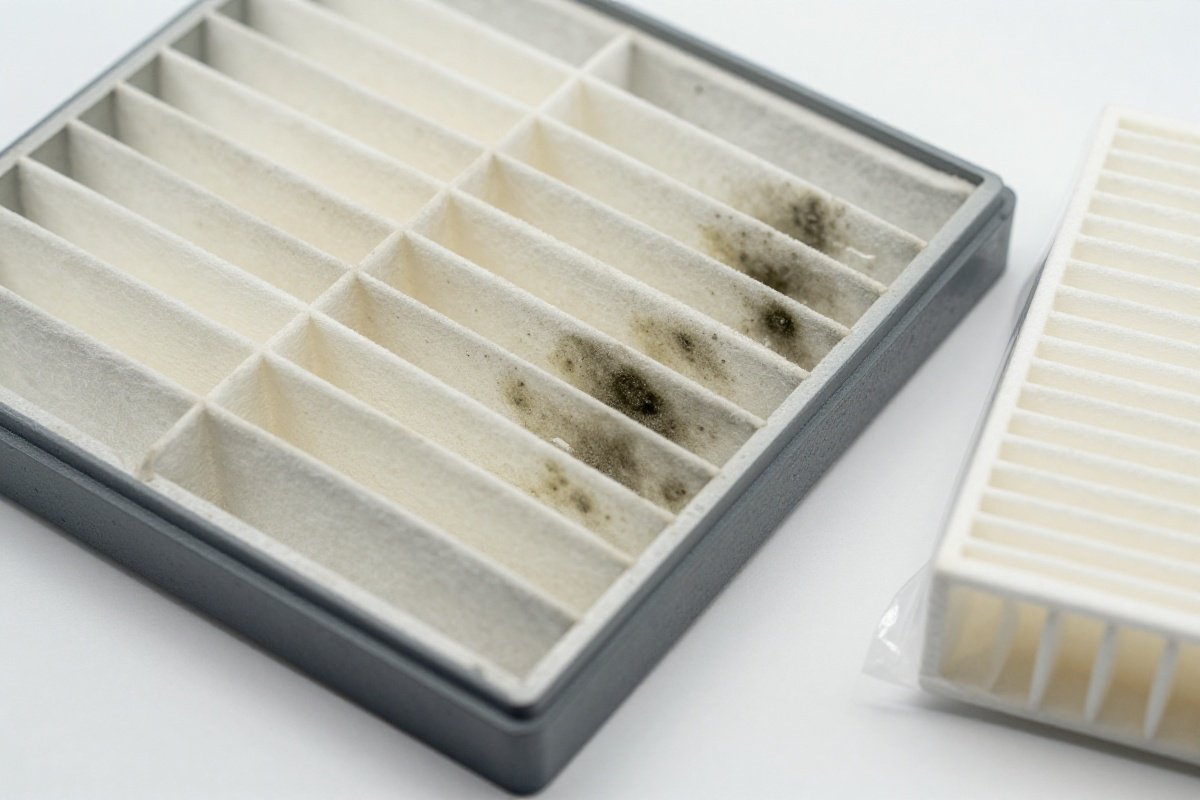
Clogged filters are the most common cause of vacuum odors - understanding how your vacuum’s filtration system works explains why. They absorb too much dirt and dust, restricting airflow and trapping bacteria. Replace pre-motor filters every 3 months with regular use, and HEPA filters every 6-12 months depending on manufacturer guidelines. Mark your calendar or set phone reminders to stay on schedule.
Belt Inspection and Replacement
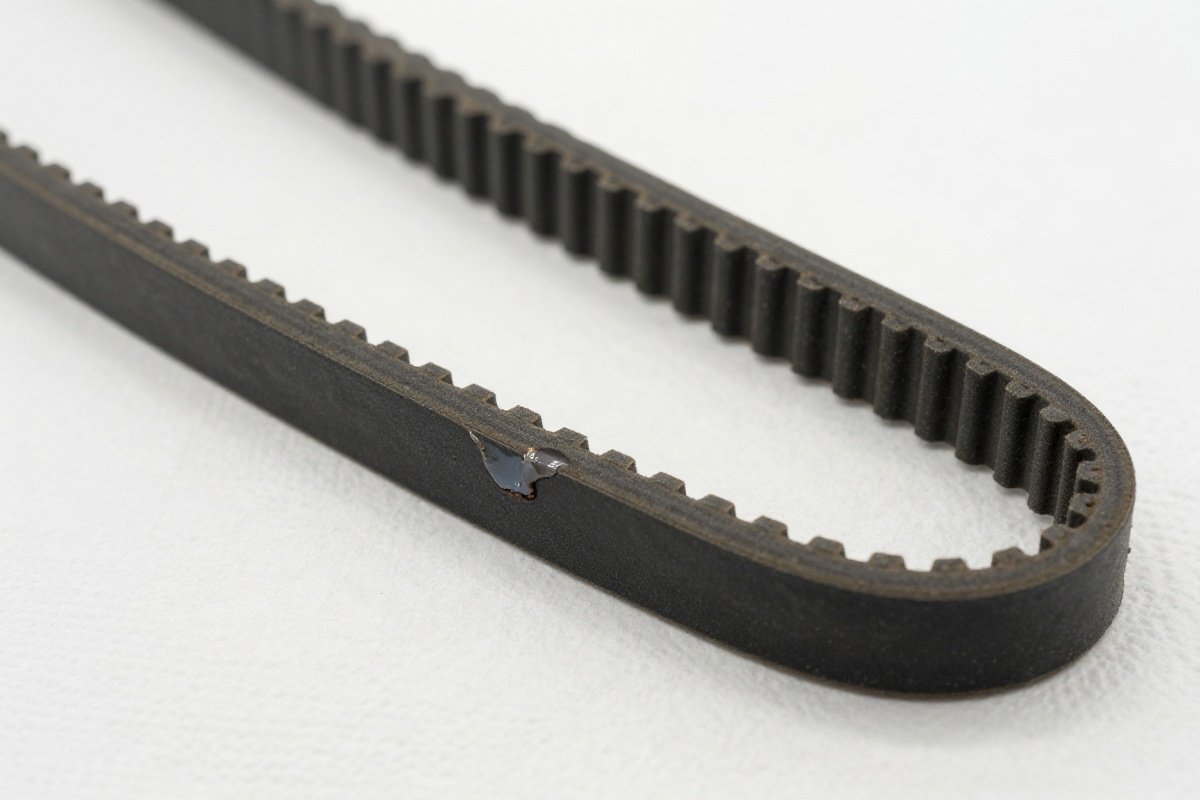
A worn or stretched belt causes the roller to not spin properly, creating friction and burnt rubber smells. Inspect your vacuum belt every 6 months for cracking, fraying, or stretching. Replace immediately if you notice the roller not spinning properly or any burning odor during operation.
Proper Storage to Prevent Moisture
Moisture and mold develop when vacuums are stored in damp areas or used on wet surfaces. Always store your vacuum in a climate-controlled area away from bathrooms, basements, and garages. Never vacuum damp carpets or spills - moisture trapped in filters or canisters creates musty odors and mold growth within 24-48 hours.
Dustbin Emptying Frequency
Empty bagless canisters after every use or when they reach half capacity. For bagged models, replace bags when they’re two-thirds full. Allowing debris to sit creates decomposition odors, especially organic materials like pet hair or food particles.
Brush Roll Cleaning
Pet hair buildup creates odor over time as oils and dander decompose. Remove hair and debris from the brush roll weekly by cutting wrapped fibers with scissors and pulling them away. Check for string, carpet fibers, or large debris that could cause friction smells.
When to Seek Professional Repair
Turn off your vacuum immediately if you detect a burning smell and check the belt, filter, and brush roll. If the odor persists after cleaning these components, or if you notice electrical burning smells (hot plastic or wire), discontinue use immediately. A worn-out motor or internal electrical issues require professional service - see our vacuum repair DIY guide for fixes you can handle yourself. Continuing to use a damaged vacuum risks fire hazards and further damage.
Cause 1: Burning Rubber Smell
What’s Happening
The most common cause of burning rubber smell is friction from a stuck brushroll or slipping belt. When the brushroll can’t spin freely, the belt continues to rotate against it, creating heat and melting rubber odor.
Why It Happens
- Hair wrapped tightly around brushroll
- Debris jammed in brushroll bearings
- Worn or stretched belt slipping
- Brushroll installed incorrectly
- Carpet fiber buildup
- Belt issues (worn, stretched, or snapped)
Diagnostic Steps
- Power off immediately upon smelling burning rubber
- Unplug the vacuum and let it cool for 10 minutes
- Inspect the brushroll for hair wraps or debris
- Check belt tension - should feel taut, not loose
- Rotate brushroll by hand - should spin freely without resistance
How to Fix It
Step 1: Turn Off Immediately Stop using the vacuum to prevent belt damage or motor strain.
Step 2: Check the Brushroll
- Unplug vacuum (safety first)
- Remove bottom plate or brushroll cover
- Check for:
- Hair wrapped around brushroll (cut with scissors, pull away)
- String or fiber tangles
- Large debris stuck in bearings
- Worn or damaged brushroll bristles
Step 3: Inspect the Belt
-
Look for signs of wear:
- Cracking or fraying
- Stretching (should be taut)
- Melting or glazing
- Broken or snapped
-
Replace if any damage found
Step 4: Test Rotation Spin brushroll by hand - it should rotate freely with minimal resistance. If stiff or grinding, check bearings or replace brushroll.
Step 5: Reassemble and Test Run vacuum briefly and check for smell. If burning odor persists, professional service needed.
Prevention
- Clean brushroll weekly (monthly minimum)
- Check for hair buildup after vacuuming long hair or pet areas
- Replace belt annually or when showing wear
- Don’t vacuum over large objects or cords
Cause 2: Electrical Burning Smell
What’s Happening
An electrical burning smell indicates overheating components, short circuits, or motor damage. This is the most serious vacuum odor and requires immediate attention.
Why It Happens
- Motor overheating from blockages
- Failing motor windings
- Short circuit in wiring
- Overloaded electrical circuit
- Damaged power cord
- Worn-out motor creating burning plastic/rubber smell
Immediate Actions
STOP USING IMMEDIATELY
- Turn off and unplug vacuum
- Check for visible damage to cord
- Let vacuum cool completely (30+ minutes)
- Do not use until cause identified
Troubleshooting
If smell came from motor area:
- Likely motor damage or severe overheating
- May require professional repair or replacement
- Check if vacuum is under warranty
If smell came from power cord:
- Inspect entire cord for damage
- Check plug and outlet for scorch marks
- Try different outlet
- Replace cord if damaged
If vacuum was working hard before smell:
- May be blockage-related overheating
- Clean all filters and check for clogs
- Let cool completely before retrying
When to Replace vs Repair
| Situation | Recommendation | Cost Estimate |
|---|---|---|
| Cord damage only | Replace cord | Low |
| Motor overheating (first time) | Clean thoroughly, retry | Free |
| Repeated motor overheating | Replace vacuum | Varies |
| Electrical burning + smoke | Replace immediately | N/A |
| Vacuum over 5 years with motor issue | Replace | Varies |
Cause 3: Pet Hair and Dander Odors
What’s Happening
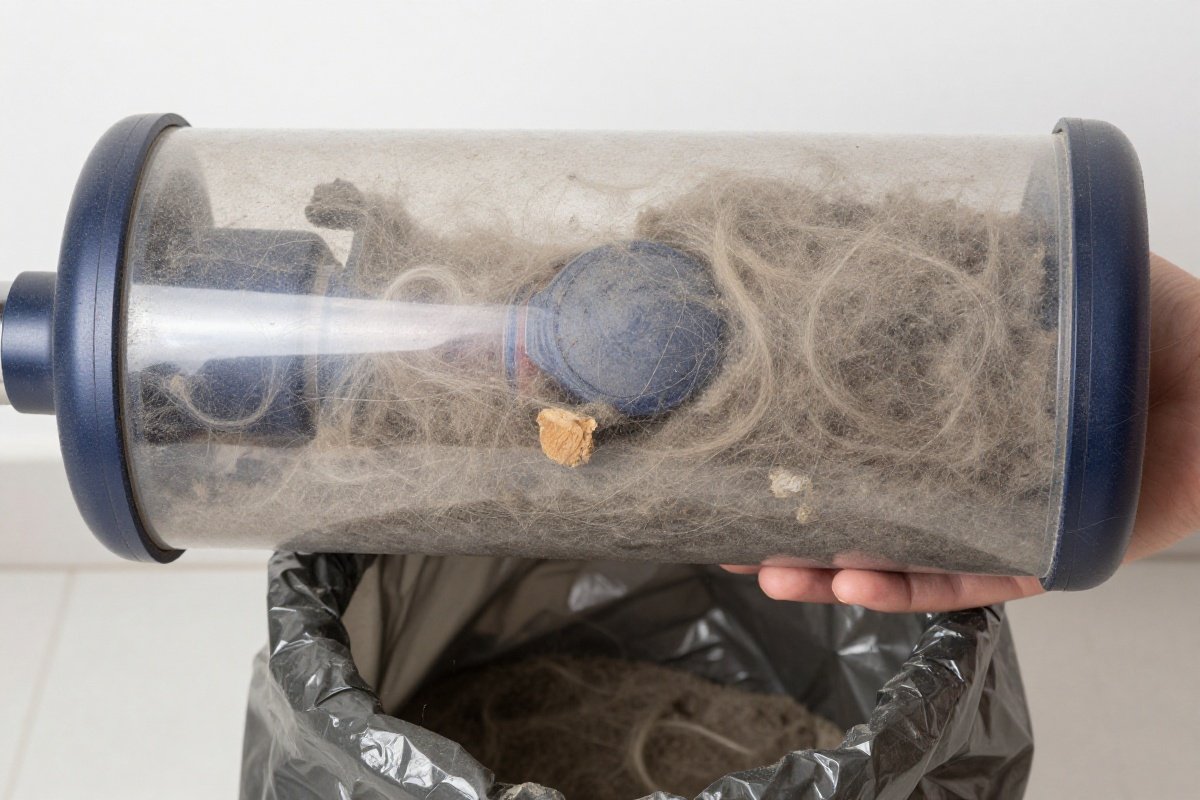
Pet owners commonly experience vacuum odors from accumulated hair, dander, skin oils, and occasional “accidents” being vacuumed up. These organic materials decompose and create persistent smells.
Why Pet Odors Linger
- Pet hair traps oils and dander
- Organic material decomposes in warm vacuum environment
- Standard filters don’t capture odor molecules
- Hair wraps around brushroll and interior components
- Moisture from wet pets or spills accelerates odor
- Pet hair buildup creates odor over time
Solutions for Pet Odors
Immediate Fixes:
-
Deep Clean the Vacuum
- Empty canister/replace bag
- Remove and clean brushroll
- Wash or replace all filters
- Wipe interior with disinfectant
-
Use Baking Soda
- Sprinkle on carpets before vacuuming
- Neutralizes odors at source
- Vacuum up thoroughly
-
Add Charcoal Filtration
- Replace standard filters with activated carbon
- Use charcoal filter inserts
- Place charcoal sachet in canister
Long-Term Solutions:
| Solution | Cost | Effectiveness |
|---|---|---|
| Carbon pre-motor filter | Low | Good |
| HEPA + carbon exhaust filter | Low-moderate | Excellent |
| Frequent filter replacement | Moderate/year | Essential |
| Upgrade to sealed system vacuum | Premium investment | Best |
Best Vacuums for Pet Odor Control
Premium Option: Miele Complete C3 Cat & Dog
- Active AirClean filter with charcoal
- Completely sealed system
- HEPA filtration
- Tier: Premium
Mid-Range Option: Shark Stratos Cordless
- Odor neutralizer technology
- Anti-hair wrap brushroll
- Good for daily pet hair
- Tier: Mid-range
Budget Option: Bissell Pet Hair Eraser
- Febreze filter included
- Tangle-free brushroll
- Specialized pet tools
- Tier: Budget-friendly
Cause 4: Musty or Mildew Smell
What’s Happening
Musty odors indicate mold or mildew growth inside your vacuum, usually from moisture accumulation. This creates both smell and potential health hazards from mold spores being redistributed.
Common Moisture Sources
- Vacuuming damp carpets or spills
- Washing filters and reinstalling wet
- Storing vacuum in humid areas
- Vacuuming in bathrooms with standing water
- Rain or snow on shoes being vacuumed
- Moisture/mold from vacuuming damp areas or storing with moisture
Dangers of Musty Vacuums
- Redistributes mold spores throughout home, worsening dust mite problems
- Can trigger allergies and asthma
- Indicates bacterial growth
- May damage vacuum motor if moisture reaches it
How to Eliminate Musty Odors
Step 1: Complete Disassembly
- Remove all filters, bags, canisters
- Take apart all removable components
- Access interior surfaces
Step 2: Thorough Cleaning
- Wash all washable parts in warm soapy water
- Use brush to scrub crevices
- Disinfect with one of these:
- White vinegar solution (1:1 with water)
- Enzyme cleaner (best for mold)
- Diluted bleach (1 cup per gallon water)
Step 3: Complete Drying (Critical)
- Air dry all components 24-48 hours
- Use fans to accelerate drying
- Ensure no moisture remains
- Filters must be bone dry before reinstalling
Step 4: Interior Motor Area
- Wipe accessible surfaces with disinfectant
- Run vacuum outdoors (no filter) for 10 minutes to air out
- Let motor compartment dry completely
Step 5: Reassembly with Fresh Components
- Install new filters (don’t reuse musty ones)
- New bag or thoroughly cleaned canister
- Ensure all parts dry before assembly
Prevention
- Never vacuum wet surfaces
- Let filters dry 24-48 hours after washing
- Store vacuum in climate-controlled area
- Empty canister after each use
- Use moisture-absorbing packets in storage closet
Cause 5: Dusty or “Burnt Dust” Smell
What’s Happening
A dusty or hot dust smell usually indicates the vacuum is overheating or the filters are severely clogged. The motor works harder, gets hotter, and burns accumulated fine dust.
Causes
- Extremely clogged filters
- Overfilled bag or canister
- Blocked hoses or wands
- Running on maximum power for extended periods
- Old vacuum with worn seals
Solutions
Immediate:
- Turn off and unplug
- Empty canister/replace bag
- Check and clean/replace filters
- Check for blockages in hose/wand
- Let cool 30 minutes before restarting
Long-term:
- Establish regular filter replacement schedule
- Don’t overfill bags (replace at 2/3 full)
- Clean pre-motor filters monthly
- Replace HEPA filters every 6-12 months
Cause 6: Rotten or Decomposing Smell
What’s Happening
A rotten, sour, or garbage-like smell indicates organic material has been sitting in the vacuum decomposing. This could be food, pet accidents, or other biological matter.
Common Sources
- Vacuumed up food crumbs or spills
- Pet accidents or vomit
- Moisture + organic debris combination
- Dead insects in bag/canister
- Long time between emptying
Solutions
For Immediate Relief:
- Empty and thoroughly clean canister/bag compartment
- Disinfect all surfaces
- Replace all filters
- Use enzyme cleaner for biological odors
For Persistent Odors:
- Complete disassembly and deep clean
- Soak components in enzyme cleaner solution
- Replace brushroll if smell persists (odors penetrate bristles)
- Consider replacing vacuum if odor embedded in motor housing
Cause 7: New Vacuum Smell (Chemical/Plastic)
What’s Happening
New vacuums sometimes emit a chemical or plastic smell from manufacturing residues, packaging materials, or “off-gassing” of new plastics and components.
Is It Dangerous?
Generally not dangerous, but can be unpleasant. The smell should dissipate within a few uses.
Solutions
- Run vacuum outdoors or in garage for 15-20 minutes
- Open windows when using initially
- Remove all packaging materials completely
- Empty and clean canister after first use
- If smell persists beyond 5-10 uses, contact manufacturer
Cause 8: Old Vacuum Smell (Aging Components)
What’s Happening
Older vacuums (8+ years) can develop odors from:
- Worn rubber components deteriorating
- Accumulated residue in motor housing
- Degraded seals and gaskets
- Worn bearings creating friction
Assessment
Understanding how long vacuums typically last helps frame this decision. If your vacuum is:
- Under 5 years: Deep clean and maintenance should resolve
- 5-8 years: May be worth repair if premium model
- Over 8 years: Likely time to replace
Filter Comparison for Odor Control
| Filter Type | Odor Control | Cost | Best For |
|---|---|---|---|
| Standard | Poor | Budget | Basic use |
| HEPA | Fair | Low-moderate | Allergies |
| Activated Carbon | Good | Moderate | General odors |
| Charcoal + HEPA | Excellent | Moderate | Pet/smoke odors |
| Arm & Hammer | Very Good | Budget | Budget option |
Prevention: Keeping Your Vacuum Smelling Fresh
Daily/Weekly Maintenance
- Empty canister after each use (or when half full)
- Check brushroll for hair wrap
- Quick wipe of exterior
Monthly Maintenance
- Clean or replace filters
- Deep clean brushroll
- Check for blockages
- Wipe interior surfaces
Quarterly Maintenance
- Replace bag (bagged models)
- Deep clean canister (bagless)
- Check belt condition
- Inspect hoses for buildup
Annual Maintenance
- Replace belt
- Replace HEPA filters
- Professional service if needed
- Evaluate if replacement needed
When to Replace vs. Repair
Replace Your Vacuum If:
- Over 8 years old with odor issues
- Motor has been damaged
- Cost of repair exceeds 50% of replacement
- Odor embedded in motor housing
- Multiple component failures
Repair/Make Do If:
- Under 5 years old
- Simple maintenance resolves issue
- Premium vacuum worth investing in
- Warranty still valid
Further Reading
- How to Vacuum Stairs: The Complete Guide (2026)
- How Often Should You Vacuum? Complete Guide by Floor Type & Lifestyle
Recommended Products for Odor Control
Odor-Eliminating Filters
Miele Active AirClean Filter
- Charcoal layer for odor absorption
- For C1/C2/C3 canisters
- Affordable replacement filter
- Replace every 6 months
Arm & Hammer Odor Eliminating Filters
- Baking soda infused
- Universal fit options
- Budget-friendly option
- Replace every 3 months
Vacuum Deodorizers
Febreze Vacuum Filter Refresher
- Easy drop-in pods
- Fresh scent
- Inexpensive maintenance item
- Lasts 30 days
Fresh Wave Vacuum Pearls
- Natural odor elimination
- No fragrance
- Affordable refill
- Lasts 60 days
Prevention Products
DampRid Moisture Absorbers
- Place in vacuum storage area
- Prevents musty smells
- Inexpensive preventive solution
Baking Soda Carpet Sprinkle
- Neutralizes odors at source
- Before vacuuming
- Very affordable
Recommended Products
Miele Complete C3 Cat & Dog
Best for pet odorsBest vacuum for pet odor control with active charcoal filtration.
What We Like
- Handheld turbo brush excellent for pet hair on furniture
- Bagged design hygienic for allergy sufferers
- German engineering with superior build quality
- Charcoal filter neutralizes pet odors effectively
What We Don't
- Very expensive compared to competitors
- Ongoing cost of replacement bags
- Lacks motorized powerhead in base configuration
Shark Stratos Cordless
Best mid-range for pet odorsThe Shark Stratos Cordless packs DuoClean PowerFins, a self-cleaning brushroll, and built-in odor neutralizer technology into a 60-minute runtime cordless vacuum with HEPA filtration. Best for pet owners seeking Shark's latest features at a lower price than the top-tier Stratos models.
What We Like
- PowerFins brush roll effectively removes pet hair without tangling
- Up to 60 minutes of runtime on standard mode
- Built-in odor neutralizer technology reduces odors
- Good value for a premium cordless vacuum with DuoClean system
- Self-cleaning brush roll prevents hair wrap
What We Don't
- Dustbin capacity is smaller than some competitors at 0.7 quarts
- Premium price point for a cordless model
- Shorter runtime on high-power mode
Bissell Pet Hair Eraser Turbo Plus
Best budget for pet odorsThe Turbo Plus upgrades the Pet Hair Eraser line with OnePass technology and an LED-lighted crevice tool for cleaning dark corners and under furniture. Best for pet owners who want a corded upright with unlimited runtime and specialized tools for tackling embedded fur on carpets and upholstery.
What We Like
- Tangle-free brush roll prevents hair wrap around brush
- Specialized pet tools including Pet TurboEraser and 2-in-1 pet dusting brush
- Febreze filter helps eliminate pet odors
- OnePass technology cleans on first pass
What We Don't
- Not a sealed allergen system like premium models
- Basic filtration compared to HEPA-equipped models
- Heavier design at nearly 18 lbs
Arm & Hammer Odor Eliminating Vacuum Filters
Best odor filtersThese baking soda-infused filters neutralize odors at the source without masking fragrances, keeping your vacuum exhaust smelling fresh. Best for pet owners and allergy-prone households looking for an affordable filter upgrade.
What We Like
- Baking soda odor control
- Universal fit options
- Affordable
- Easy to replace
What We Don't
- Needs frequent replacement
- Not for all models
- Does not improve actual filtration or suction performance
Febreze Vacuum Filter Refresher
Quick fresheningFebreze Vacuum Filter Refresher pods provide a fast, no-mess way to eliminate vacuum exhaust odors without disassembling the machine or replacing filters. They are best for quick freshening between deep cleans, especially in homes with pets where vacuum odors develop between filter replacements.
What We Like
- Easy to use
- Fresh scent
- Inexpensive
- Works with most vacuums
What We Don't
- Temporary fix only
- Strong fragrance
- Does not address root causes of odor like dirty filters or clogged hoses
Sources & Research
Continue Reading
Explore more maintenance & floor care content or browse our other categories.
Frequently Asked Questions
- Why does my vacuum smell like burning?
- A burning smell from your vacuum typically indicates one of these issues: (1) Belt friction from a stuck brushroll or broken belt - turn off immediately and check for obstructions; (2) Motor overheating from blockages or overuse - clean filters and let cool; (3) Electrical problems with wiring or motor - discontinue use and have serviced; (4) Debris caught in the motor housing - requires disassembly to clean. If the smell is acrid like electrical fire or rubber burning, stop using immediately to prevent damage or fire hazard. For rubber belt smells, check and replace the belt. For electrical smells, the vacuum needs professional repair or replacement. Regular maintenance including brushroll cleaning and filter replacement prevents most burning odors.
- Why does my vacuum smell like dog or wet dog?
- Vacuum smells like dog due to pet hair, dander, and oils accumulating in the vacuum. The odor comes from: (1) Hair and dander trapped in filters, bags, or canister decomposing over time; (2) Moisture from damp pet hair creating musty smells; (3) Bacteria growth in organic debris; (4) Oil residue from pet coats coating internal surfaces. To fix: Empty canister or replace bag after each use with heavy pet hair; clean or replace filters monthly; wipe down interior surfaces with disinfectant; use activated carbon or charcoal filters designed for pet odors; sprinkle baking soda on carpets before vacuuming to neutralize odors; consider a vacuum with sealed HEPA system and charcoal filtration like Miele Cat & Dog models. Prevention includes more frequent emptying and using odor-control filters.
- Why does my vacuum smell musty or like mildew?
- A musty or mildew smell indicates moisture problems in your vacuum. Common causes: (1) Vacuuming damp carpets or wet spills - moisture trapped in filters, bag, or canister grows mold/mildew; (2) Storing vacuum in humid environments like basements or garages; (3) Washing filters and reinstalling before completely dry (24-48 hours); (4) Leaving debris in canister/bag too long in humid conditions. To fix: Disassemble vacuum completely; wash all washable parts with mild detergent; disinfect with diluted vinegar or enzyme cleaner; dry ALL components thoroughly for 24-48 hours; replace any moldy filters or bags; run vacuum without filter to air out motor compartment (outdoors). Prevention: Never vacuum wet surfaces; ensure filters are bone dry before reinstalling; empty after each use; store in climate-controlled area; use moisture-absorbing packets in storage.
- How do I get rid of vacuum odor?
- To eliminate vacuum odors: (1) Deep clean the vacuum - disassemble and wash all removable parts with warm soapy water; (2) Replace all filters with new ones - old filters hold odors; (3) Clean or replace the brushroll - hair and debris trap smells; (4) Wipe interior surfaces with disinfectant or vinegar solution; (5) Replace bag or thoroughly clean canister; (6) Run vacuum outdoors for 10 minutes without filter to air out motor; (7) Place activated charcoal or baking soda in canister overnight; (8) Use odor-eliminating filter refresher tablets; (9) For persistent odors, use enzyme cleaner designed for pet odors on interior surfaces. Prevention is easier - empty after each use, replace filters regularly, avoid vacuuming wet items, and store properly. If odor persists after thorough cleaning, the smell may be in the motor requiring professional service or replacement.
- Can I put essential oils or fragrance in my vacuum?
- While tempting, adding essential oils or fragrance directly to your vacuum is not recommended and can cause damage. Essential oils can: degrade rubber seals and gaskets; clog filters reducing suction; damage motor components; create fire hazards if contacting hot motor parts; void warranties. Fragrance beads or powders can melt in the motor housing causing damage. Safe alternatives include: using scented vacuum bags or filters designed for fragrance; placing dryer sheets in the canister (not near motor); using baking soda with a few drops of essential oil on carpets before vacuuming (let dry first); commercial vacuum beads specifically designed for this purpose placed in the canister away from motor. The safest approach is addressing the root cause of odors through proper maintenance rather than masking them with fragrances that could damage your vacuum.
Written By
Home Vacuum Zone
Our team researches, tests, and reviews vacuum cleaners to help you make confident buying decisions.
Related Articles
How to Clean and Maintain a Robot Vacuum: Complete Guide
Learn how to clean your robot vacuum properly. Step-by-step guide covers dustbin emptying, filter cleaning, brush roll maintenance, sensor care, and dock maintenance.
5 Best Steam Mops for Hardwood Floors (2026 Reviews)
Find the best steam mop for hardwood floors in 2026. Our top picks include safe, effective options from Bissell, Shark, and PurSteam with adjustable steam settings.
How Often Should You Vacuum? Complete Guide by Floor Type & Lifestyle
Learn exactly how often to vacuum based on your home's traffic, pets, allergies, and floor type. Get personalized recommendations and discover the best vacuums for your specific needs.