Affiliate Disclosure:Home Vacuum Zone is reader-supported. When you buy through links on our site, we may earn an affiliate commission at no additional cost to you. This does not influence our reviews or recommendations — we only recommend products we genuinely believe in.
Important Safety Notice: This guide addresses minor mold infestations under 10 square feet. According to the CDC and EPA, larger mold problems require professional remediation. Mold exposure can cause respiratory symptoms, allergic reactions, and asthma attacks. Individuals with compromised immune systems, chronic lung conditions, or mold allergies should avoid DIY mold removal and consult professionals.
Mold in carpet is a serious health concern that requires immediate attention. Whether caused by moisture intrusion, flooding, or high humidity, carpet mold can spread quickly and release spores that affect indoor air quality. If you’re an allergy sufferer, this problem is especially urgent - see our vacuum guide for allergy sufferers for HEPA filtration recommendations. This comprehensive guide walks you through safe, effective DIY mold removal for small, manageable infestations.
When to DIY vs. Call a Professional
DIY Is Appropriate When:
- Mold covers less than 10 square feet (approximately 3x3 feet)
- Mold is on the carpet surface only (not backing or pad)
- You have no respiratory conditions or mold allergies
- The cause of moisture has been identified and fixed
Call a Professional When:
- Mold exceeds 10 square feet or covers multiple areas
- You suspect black mold (Stachybotrys chartarum)
- Mold has penetrated carpet backing or padding
- HVAC systems are contaminated
- Anyone in the household has asthma or immune system issues
- The water source was sewage or contaminated water
Professional mold remediation can range from several hundred to several thousand dollars depending on severity, but health and safety justify the expense for large infestations.
The 10-square-foot threshold isn’t arbitrary - it’s based on EPA guidelines that recognize DIY methods become ineffective beyond this size. Larger infestations indicate systemic moisture problems requiring professional equipment like industrial dehumidifiers, air scrubbers, and containment systems that prevent spore migration to other rooms.
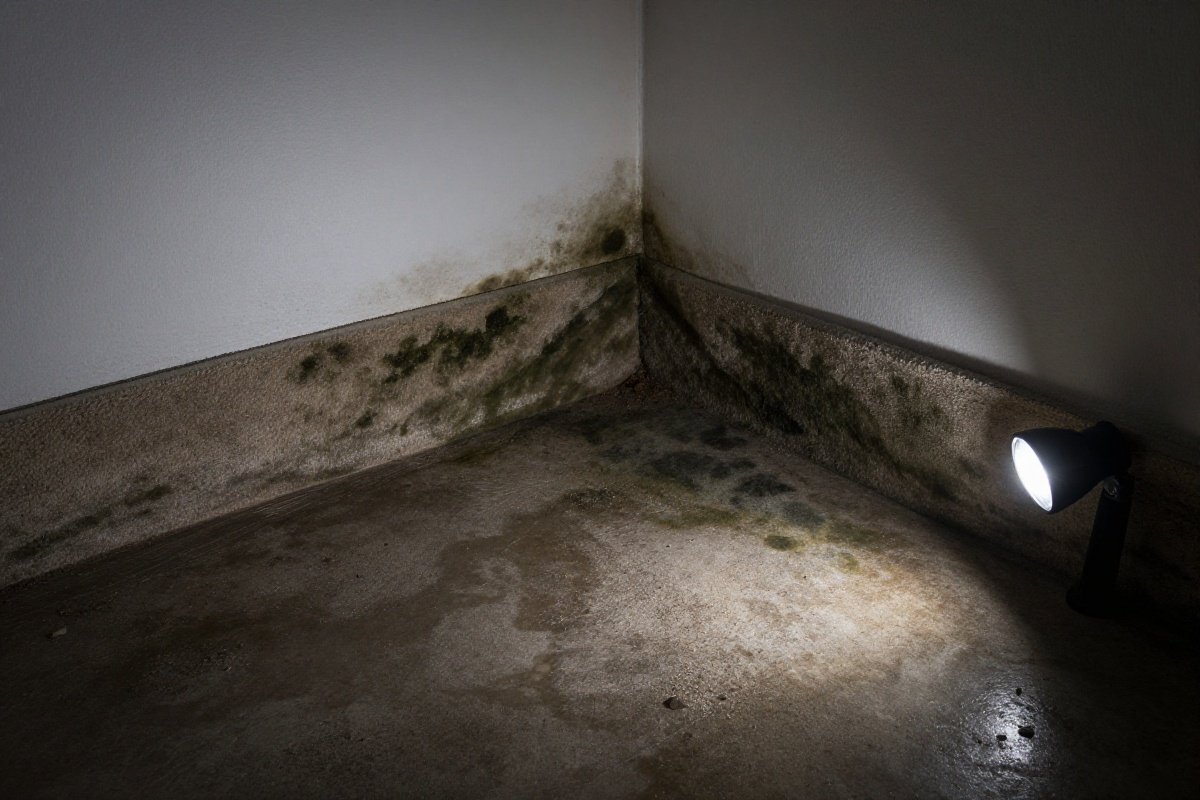
Understanding Mold Growth Patterns
Mold doesn’t grow randomly. It follows predictable patterns that help you assess whether DIY remediation is realistic:
Common carpet mold locations:
- Along exterior walls where condensation occurs
- Near bathroom thresholds where humidity escapes
- Under potted plants or pet water bowls (pet owners should also consider whether vacuuming removes pet dander effectively enough to reduce allergen buildup)
- Around windows with condensation problems
- In basement carpeting with concrete subfloors
If you find mold in multiple locations simultaneously, this suggests a whole-house moisture problem that DIY spot treatment won’t resolve. Professional assessment can identify hidden water intrusion, HVAC issues, or ventilation deficiencies creating conditions for widespread mold growth.
Before You Begin: Essential Safety Precautions
Mold spores become airborne during cleaning, creating inhalation risks. Proper protection is non-negotiable:
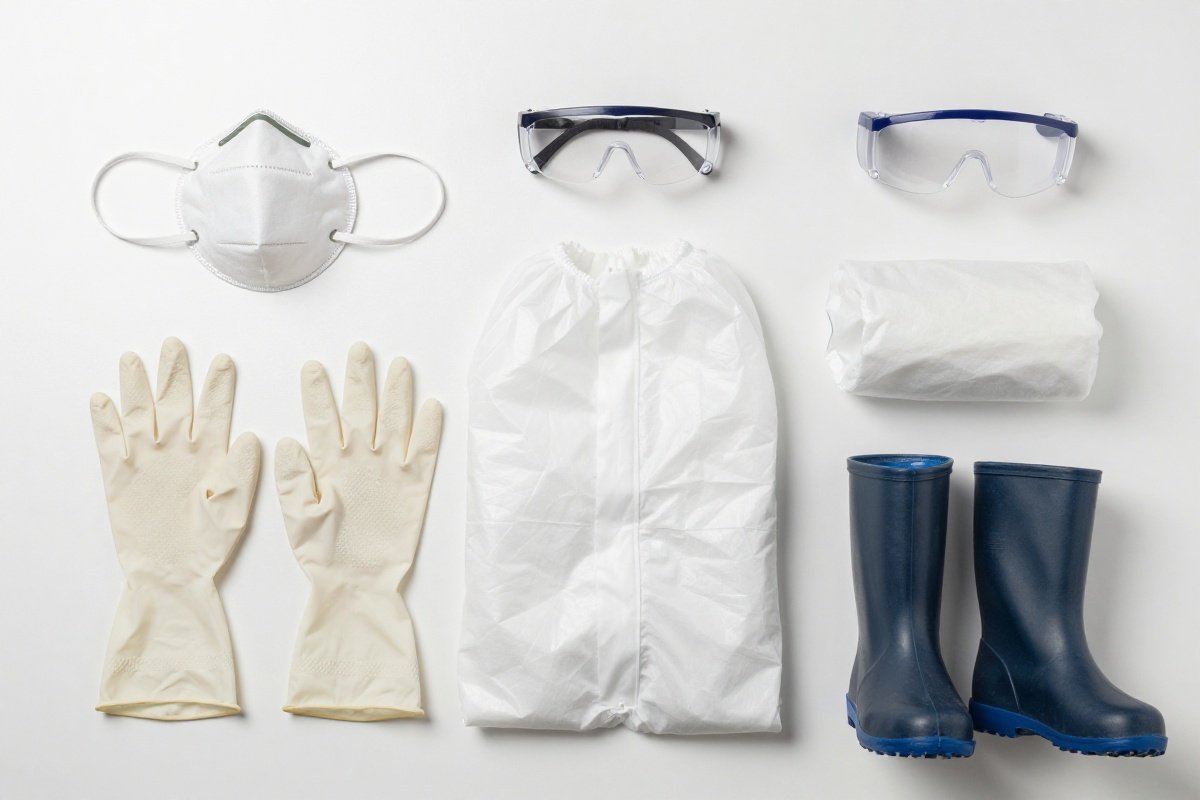
Required Personal Protective Equipment (PPE)
- N95 respirator mask (minimum - P100 preferred for severe cases)
- Safety goggles without ventilation holes
- Rubber gloves extending to mid-forearm
- Long sleeves and pants (disposable coveralls ideal)
- Closed-toe shoes you’ll discard or thoroughly clean after
Prepare Your Work Area
- Seal the room by closing doors and covering vents with plastic sheeting
- Open windows for ventilation if outdoor humidity is low
- Remove furniture from the affected area
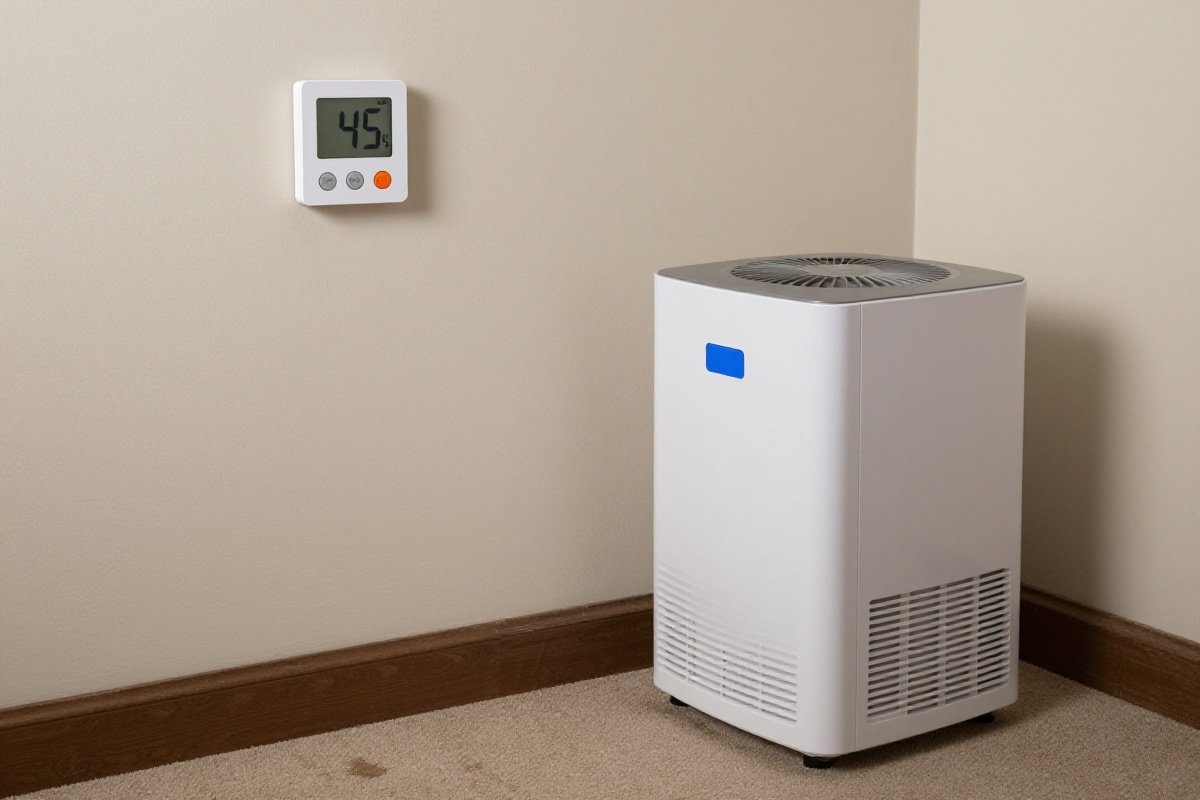
- Set up a HEPA air purifier near the work area to capture airborne spores
- Have plastic bags ready for contaminated material disposal
Important: Never mix cleaning chemicals. Combining bleach with ammonia or acids creates toxic chlorine gas. Choose ONE cleaning method and stick with it.
Why PPE Matters More Than You Think
Standard dust masks don’t filter mold spores effectively. Mold spores measure 3-40 microns - small enough to pass through basic masks and penetrate deep into lung tissue. N95 respirators filter at least 95% of airborne particles down to 0.3 microns, providing adequate protection for most DIY scenarios.
However, people with pre-existing respiratory conditions should opt for P100 respirators (99.97% filtration) or avoid DIY mold work entirely. The cost difference between N95 and P100 masks is negligible compared to potential medical expenses from mold exposure.
Containment Strategies for Preventing Cross-Contamination
Even small mold remediation projects require containment to prevent spores from migrating to clean areas:
Basic containment setup:
- Hang plastic sheeting in doorways using painter’s tape
- Create a “slit entry” by cutting vertical opening in plastic
- Place adhesive walk-off mats outside containment area
- Remove PPE before exiting containment zone
- Dispose of contaminated materials directly into outdoor trash
For basements or rooms with forced-air vents, covering vents with plastic and tape prevents HVAC systems from distributing spores throughout your home. This simple step prevents turning a localized problem into a whole-house contamination event.
The 10-Step Mold Removal Process
Step 1: Assess the Damage
Before starting removal, determine the full extent of mold growth. Lift carpet corners and use a flashlight to inspect:
- Surface mold (green, black, or white patches on carpet fibers)
- Backing penetration (discoloration on carpet underside)
- Padding condition (mold in carpet pad requires pad replacement)
- Subfloor status (mold on subfloor requires professional treatment)
If mold has penetrated backing or padding: Stop and call a professional. Surface cleaning won’t eliminate hidden mold that will regrow within weeks.
Conducting a Thorough Damage Assessment
Use a systematic approach to document mold extent:
- Photograph all affected areas from multiple angles with good lighting
- Measure affected dimensions with a tape measure
- Map the location relative to walls, doors, and windows
- Note any patterns (concentrated near one wall, radiating from center, etc.)
- Check adjacent rooms by lifting carpet at thresholds
This documentation serves two purposes: tracking remediation progress and providing evidence for insurance claims if professional help becomes necessary. Many homeowners discover that “small” mold problems extend beyond initial observations once they perform thorough inspections.
Using Moisture Meters for Hidden Problems
Professional-grade moisture meters (affordable at most hardware stores) detect water in carpet backing and padding that looks dry on the surface. These devices measure moisture content as a percentage:
- Below 16%: Generally safe, mold unlikely to grow
- 16-20%: Elevated moisture, mold risk present
- Above 20%: Active moisture problem requiring immediate intervention
Take readings at the mold site, then expand outward in a grid pattern at 12-inch intervals. This reveals whether moisture extends beyond visible mold, indicating a larger problem than surface appearance suggests.
Step 2: Stop the Moisture Source
Mold requires moisture to grow. Without addressing the water source, mold will return regardless of cleaning efforts:
- Fix leaks in plumbing, roofs, or windows
- Improve ventilation in bathrooms and kitchens
- Install dehumidifier if indoor humidity exceeds 50%
- Clean gutters and direct downspouts away from foundation
- Grade soil away from house to prevent basement seepage
Target humidity: Keep indoor relative humidity below 50% (30-50% ideal) to prevent mold regrowth.
Common Hidden Moisture Sources
Some moisture problems hide behind walls or under floors, making them difficult to identify:
Condensation issues:
- Cold water pipes lacking insulation
- Air conditioning ducts without vapor barriers
- Single-pane windows in humid climates
- Concrete slabs without moisture barriers
Structural problems:
- Improperly flashed chimneys
- Missing or damaged vapor barriers in crawl spaces
- Foundation cracks allowing groundwater seepage
- Ice dams on roofs during winter
If you can’t identify an obvious moisture source but mold persists after remediation, consider hiring a home inspector with thermal imaging equipment. Thermal cameras reveal temperature differences indicating hidden moisture, often finding problems invisible to standard inspection methods.
Step 3: Ventilate the Area
Create airflow to carry spores away from your workspace and speed drying:
- Open windows on opposite sides of room for cross-ventilation
- Run exhaust fans pointing outward
- Position HEPA air purifier between work area and door
- Close HVAC vents in the room to prevent spore circulation
Note: Only ventilate if outdoor humidity is below 60%. High outdoor humidity will worsen the problem.
Step 4: Remove Loose Debris and Contaminants
Before applying cleaning solutions, remove surface contamination:
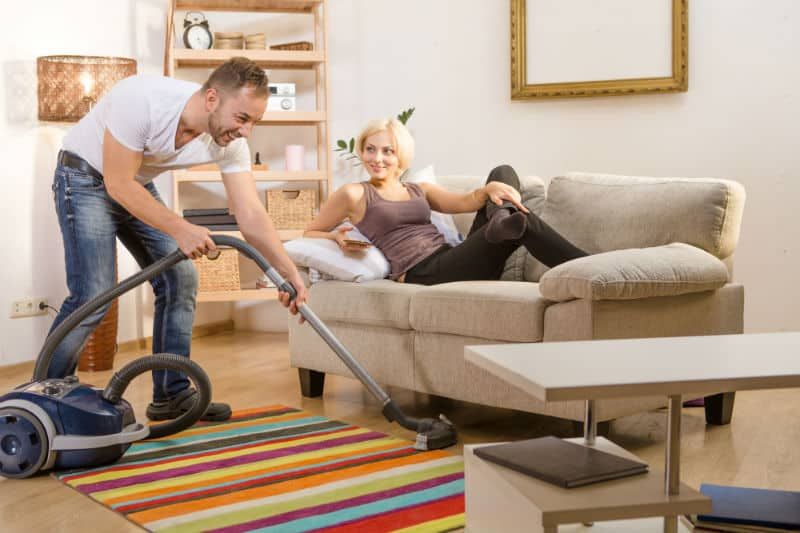
- HEPA vacuum the affected area thoroughly, going slowly to maximize spore capture
- Dispose of vacuum bag or contents immediately in sealed plastic bag
- Remove any items from carpet that can be cleaned separately
- Cut away carpet fibers that are severely degraded or crumbling
Critical: Use only a vacuum with sealed HEPA filtration. Standard vacuums exhaust mold spores back into the air, spreading contamination.
Proper HEPA Vacuum Technique
Vacuuming technique significantly impacts mold spore removal effectiveness:
Optimal vacuuming method:
- Move vacuum head at 1 foot per second (count “one-thousand-one” per foot)
- Overlap passes by 50% to ensure complete coverage
- Use crevice tools for edges and corners where spores concentrate
- Vacuum in multiple directions (horizontal, then vertical)
- Make at least three complete passes over moldy areas
Models like the Shark Navigator Lift-Away Deluxe NV360 or Dyson Ball Animal 3 Extra feature sealed HEPA systems that prevent spore escape during vacuuming - critical for safe mold cleanup. Standard vacuums without sealed systems may capture large debris but exhaust microscopic spores through motor vents, actually spreading contamination while appearing to clean.
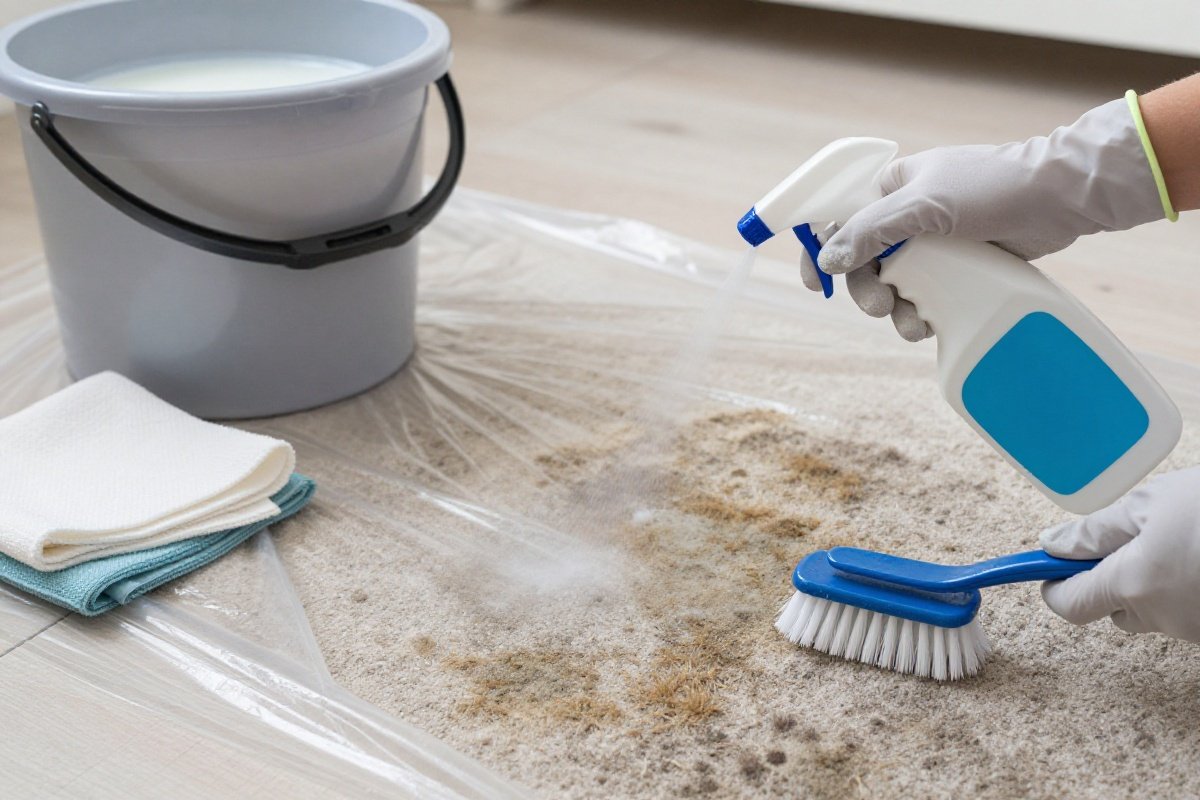
Step 5: Apply Anti-Mold Treatment
Choose your cleaning approach based on mold severity and personal sensitivity:
Option A: Commercial Anti-Mold Spray (Recommended) Products like Concrobium Mold Control or RMR-86 are specifically formulated to kill mold without the harsh fumes of bleach.
- Spray thoroughly until surface is visibly wet
- Ensure complete coverage of all discolored areas
- Extend 6 inches beyond visible mold to kill hidden growth
Option B: White Vinegar Solution (Natural Alternative) Undiluted white vinegar kills 82% of mold species (per University of Arizona study).
- Pour white vinegar into spray bottle
- Saturate moldy areas completely
- Let sit 1 hour before next step
Option C: Borax Solution (Preventive Benefits) Mix 1 cup borax per gallon of water. Borax kills mold and inhibits regrowth.
- Apply with sponge or spray bottle
- Do not rinse - residual borax prevents future growth
- Safe for most carpet types but test for colorfastness first
Do NOT use: Bleach on carpet. Bleach can damage fibers, remove color, and create dangerous fumes. It also adds moisture that can worsen mold problems.
Understanding Mold-Killing Mechanisms
Different anti-mold treatments work through distinct mechanisms:
Concrobium-type products crush mold spores as they dry, creating a physical barrier that prevents regrowth. This mechanical action works on all mold species without chemical toxicity, making these products safer for households with children, pets, or chemical sensitivities.
Vinegar (acetic acid at 5-8% concentration) disrupts mold cell walls and metabolism. However, vinegar’s effectiveness varies by mold species - it excels against common household molds but may fail against more resistant species like Stachybotrys.
Borax (sodium borate) inhibits mold through pH manipulation, creating alkaline conditions incompatible with fungal growth. Unlike treatments that simply kill existing mold, borax’s residual effect provides ongoing protection for weeks or months.
Application Techniques for Maximum Effectiveness
How you apply anti-mold treatments matters as much as which product you choose:
Spray application best practices:
- Hold bottle 6-8 inches from carpet surface
- Use fine mist setting for even coverage
- Apply until carpet surface glistens but doesn’t puddle
- Work in sections to ensure no areas get missed
- Reapply to spots where liquid absorbs quickly
For stubborn mold colonies, consider double treatment: apply your chosen product, let it work for the recommended time, then apply a second coat before drying. This approach ensures complete penetration into carpet pile and backing interfaces where mold often hides.
Step 6: Dry Thoroughly with a Dehumidifier
Critical Correction: Use a DEHUMIDIFIER (not a humidifier) to extract moisture from the air and accelerate carpet drying. Run for 24-48 hours until carpet is completely dry to the touch.
Drying Protocol:
- Position dehumidifier in center of treated area
- Empty collection bucket frequently or use continuous drain
- Run ceiling fans or portable fans to increase air circulation
- Lift carpet edges to allow airflow underneath
- Check hidden areas (under furniture, along baseboards) with moisture meter
Why this matters: Humidifiers add moisture to air - the exact opposite of what you need. Using a humidifier during mold cleanup is dangerous and counterproductive, potentially making the mold problem significantly worse.
Dehumidifier Capacity and Placement
Choosing the right dehumidifier capacity prevents under-drying that leaves moisture for mold regrowth:
Capacity guidelines for carpet drying:
- 30-pint units: Rooms up to 1,500 sq ft with moderate dampness
- 50-pint units: Rooms up to 4,500 sq ft or smaller spaces that are very damp
- 70-pint units: Large basements or rooms with standing water issues
Models like the Frigidaire 50-Pint Dehumidifier handle whole-room carpet drying effectively, maintaining optimal humidity levels throughout the remediation process. Position dehumidifiers centrally for best air circulation, and place them on solid surfaces - not on damp carpet where they can sink or tip.
Accelerated Drying Techniques
Speed drying prevents mold spores from germinating during the remediation process:
Combination drying strategy:
- Run dehumidifier continuously on highest setting
- Position box fans to blow across carpet surface
- Lift carpet edges and place fans underneath for air circulation
- Use wet/dry vacuum to extract standing water before dehumidification
- Raise room temperature to 75-80°F (if outdoor venting isn’t possible)
Carpet should feel completely dry to bare hand touch within 24-48 hours. If it still feels cool or damp after 48 hours of dehumidification, moisture has penetrated too deeply for DIY remediation - professional water extraction equipment may be necessary.
Step 7: HEPA Vacuum Again
Once carpet is completely dry (minimum 24 hours), vacuum thoroughly with HEPA vacuum:
- Slow passes - one second per foot of movement
- Multiple directions - vacuum north-south then east-west
- Edges and baseboards - use crevice tool along all perimeters
- Two complete passes over entire affected area
Post-cleanup vacuum maintenance: Empty canister or change bag outside immediately. Clean vacuum exterior with disinfectant wipes to remove any settled spores.
Step 8: Apply Baking Soda Treatment
Baking soda absorbs residual moisture and odors:
- Sprinkle generous layer over treated area (approximately 1 cup per 10 sq ft)
- Work into carpet fibers with stiff brush
- Leave overnight (8-12 hours minimum)
- Vacuum thoroughly the next day
Deodorizing enhancement: Add 10 drops tea tree essential oil to baking soda before application. Tea tree oil has natural antifungal properties that provide additional protection.
The Science Behind Baking Soda Treatment
Sodium bicarbonate (baking soda) serves multiple functions in mold remediation:
Moisture absorption: Baking soda’s crystalline structure creates surface area that draws moisture from carpet fibers through capillary action. This removes residual dampness that could support mold regrowth.
Odor neutralization: Mold produces volatile organic compounds (VOCs) that create musty smells. Baking soda chemically neutralizes these acidic compounds rather than simply masking odors like air fresheners.
pH adjustment: Baking soda’s alkaline pH (around 8.3) creates temporary conditions less favorable for mold growth, providing a buffer period while moisture levels fully stabilize.
Alternative Natural Deodorizers
Beyond baking soda, several natural products enhance odor control:
Activated charcoal: Place bowls of activated charcoal around treated areas to absorb VOCs. Unlike baking soda, charcoal works through adsorption (molecules bonding to carbon surface) rather than absorption, making it effective for persistent odors.
Zeolite crystals: These volcanic minerals trap odor molecules in their porous structure. Spread zeolite over carpet like baking soda, or place it in mesh bags around the room for continuous odor control.
Essential oil combinations: Mix 5 drops each of tea tree, eucalyptus, and lavender oils with 1 cup baking soda. This combination provides antifungal action (tea tree), antimicrobial properties (eucalyptus), and pleasant scent (lavender).
Step 9: Monitor for Regrowth
Mold can return if moisture control fails. Monitor the treated area for 2-4 weeks:
- Visual inspection every 2-3 days for new discoloration
- Smell test - musty odors indicate hidden regrowth
- Moisture meter checks if available (should read below 16%)
- Humidity monitoring - keep room humidity below 50%
Signs of regrowth: Any new dark spots, returning musty smell, or allergic symptoms when in the room indicate incomplete remediation.
Creating a Monitoring Checklist
Systematic monitoring catches regrowth before it becomes a major problem:
Week 1-2 monitoring protocol:
- Daily visual inspection under bright lighting
- Daily odor check (musty smell often precedes visible growth)
- Check humidity levels twice daily with hygrometer
- Touch-test carpet for dampness in previously affected areas
- Note any allergy symptoms experienced in the room
Week 3-4 monitoring protocol:
- Visual inspection every 2-3 days
- Weekly moisture meter readings if available
- Monitor humidity levels once daily
- Document any changes with dated photographs
If you detect any signs of regrowth during this period, repeat the treatment immediately. Second occurrences within 30 days suggest the moisture source wasn’t fully addressed or the mold penetrated deeper than initial assessment indicated.
Step 10: Replace vs. Remediate Decision
Even with successful surface cleaning, some situations require carpet replacement:
Replace carpet when:
- Mold returns within 30 days after proper remediation
- Carpet backing was affected (not just surface fibers)
- Padding was wet and couldn’t be fully dried within 48 hours
- Subfloor shows mold or water damage
- Anyone in household experiences persistent respiratory symptoms
Cost consideration: Professional carpet cleaning is relatively affordable, while full replacement costs considerably more per square foot. For areas over 100 square feet with severe mold, replacement often costs less than repeated remediation attempts. After replacing carpet, invest in the best vacuum for your carpet type to maintain it properly from the start.
When to Replace vs. Remediate Carpet
Remediation Is Sufficient When:
- Surface mold only, limited to carpet fibers
- Prompt treatment (within 24-48 hours of moisture event)
- No musty odor after thorough drying
- Area less than 10 square feet
- Carpet less than 5 years old with good condition backing
Replacement Is Necessary When:
- Mold has penetrated to backing or padding
- Water sat for more than 48 hours before treatment
- Carpet is over 10 years old and showing wear
- Mold covers large area (over 10 square feet)
- Multiple regrowth incidents after remediation
- Subfloor moisture damage present
Health Priority: When in doubt, replace. Carpet is replaceable - your respiratory health is not.
Cost-Benefit Analysis of Replacement vs. Remediation
Making the replacement decision involves weighing immediate costs against long-term expenses:
Total remediation costs for borderline cases:
- Anti-mold products: low cost
- Dehumidifier rental or purchase: moderate investment
- HEPA vacuum (if purchasing): moderate to significant investment
- PPE and supplies: low cost
- Time investment: 8-12 hours
- Total: several hundred to over a thousand dollars
Carpet replacement costs:
- Material: moderate per sq ft (mid-grade)
- Installation: additional per sq ft
- Padding: nominal per sq ft
- Removal/disposal: nominal per sq ft
- Total: several dollars to mid-teens per sq ft
For a 10x12 room (120 sq ft), replacement typically costs significantly more than remediation. However, remediation that fails requires re-treatment or eventual replacement anyway, potentially doubling costs. Factor in health risks from incomplete mold removal when making this decision.
Insurance Considerations for Mold Damage
Homeowners insurance coverage for mold varies significantly:
Generally covered scenarios:
- Mold resulting from covered water damage (burst pipes, roof leaks from storms)
- Sudden, accidental water events with prompt response
- Mold remediation when part of a larger covered claim
Generally NOT covered:
- Gradual leaks or maintenance-related moisture
- Flood-related mold (requires separate flood insurance)
- Mold from neglect or failure to maintain property
- Pre-existing mold discovered during home inspections
Review your policy’s mold coverage limits - many policies cap mold coverage at a fixed limit regardless of total damage. Document everything with photos, receipts, and professional assessments to support potential claims.
Further Reading
- How to Deep Clean Carpet Without a Machine: 3 DIY Methods (2026)
- How Often Should You Vacuum? Complete Guide by Floor Type & Lifestyle
- How to Vacuum Stairs: The Complete Guide (2026)
Mold Prevention: Keep It From Coming Back
Humidity Control
- Maintain 30-50% relative humidity throughout home
- Run dehumidifier in basements and humid climates
- Use exhaust fans during showers and cooking
- Air conditioning reduces humidity during hot months
Moisture Management
- Fix leaks immediately - even small drips create mold conditions
- Clean gutters quarterly to prevent overflow and seepage
- Grade soil away from foundation to prevent basement moisture
- Inspect roof annually for missing shingles or flashing issues
Carpet-Specific Prevention
- Vacuum weekly with HEPA vacuum to remove organic matter mold feeds on - proper vacuum cleaner maintenance keeps filtration effective
- Clean spills immediately - blot thoroughly and dry completely
- Use door mats at all entrances to reduce tracked-in moisture
- Professional cleaning annually for high-traffic areas
Advanced Prevention Strategies for High-Risk Environments
Certain climates and home configurations require enhanced prevention measures:
Basement carpeting prevention:
- Install vapor barriers over concrete slabs before carpet installation
- Use carpet tiles instead of wall-to-wall carpet for easier replacement
- Select synthetic carpet materials resistant to moisture damage - learn more in our carpet care guide for different fiber types
- Install perimeter drains to channel groundwater away from foundation
- Run dehumidifier continuously during humid months
Humid climate prevention (Southeast, Gulf Coast, Pacific Northwest):
- Set air conditioning to continuous fan mode for constant air circulation
- Use moisture-resistant carpet padding (synthetic rather than foam)
- Install whole-house dehumidification systems
- Apply antimicrobial carpet treatments annually
- Consider hard flooring in high-moisture areas instead of carpet
Cold climate prevention (preventing condensation mold):
- Insulate cold water pipes to prevent condensation drips
- Maintain consistent indoor temperatures (avoid dramatic setbacks)
- Use storm windows or low-E window films to prevent condensation
- Ventilate attics properly to prevent ice dams and resulting leaks
- Run bathroom fans for 30 minutes after showers
The Role of Air Purification in Mold Prevention
HEPA air purifiers provide ongoing protection by capturing airborne mold spores before they settle and colonize:
Optimal air purifier use:
- Run continuously in previously affected rooms
- Choose units rated for room size (check CADR ratings)
- Replace filters according to manufacturer schedules
- Position away from walls for proper air circulation
- Use medical-grade H13 HEPA filters for maximum spore capture
Models like the Hathaspace Smart True HEPA Air Purifier remove particles as small as 0.1 microns - smaller than most mold spores. Running air purifiers during and after remediation reduces airborne spore counts by 90%+ within 24 hours, significantly decreasing recontamination risk.
Seasonal Maintenance Calendar for Mold Prevention
Preventive maintenance schedules reduce mold risk throughout the year:
Spring (March-May):
- Inspect roof for winter damage
- Clean gutters and downspouts
- Check basement for groundwater seepage after snowmelt
- Service air conditioning before cooling season
- Deep-clean carpets after winter humidity
Summer (June-August):
- Monitor indoor humidity (should be 40-50%)
- Inspect air conditioning drain lines for clogs
- Check attic ventilation for proper airflow
- Clean refrigerator drain pans
- Vacuum carpets weekly to remove summer moisture and debris
Fall (September-November):
- Clean gutters before leaf season
- Inspect windows and doors for air leaks
- Check basement for moisture before heating season
- Service humidification systems (if used)
- Apply antimicrobial carpet treatments before winter
Winter (December-February):
- Monitor indoor humidity (should be 30-40% to prevent condensation)
- Check for ice dams and icicles on roof edges
- Inspect windows for condensation indicating humidity problems
- Maintain consistent indoor temperatures
- Run exhaust fans during cooking and bathing
Recommended Products
Shark Navigator Lift-Away Deluxe NV360
Safe mold spore containment during cleanupEssential tool for mold remediation. The sealed HEPA system prevents mold spores from escaping during vacuuming, critical for safe DIY mold removal.
What We Like
- Brush roll shutoff enables seamless transition between carpets and hard floors
- Adjustable suction control for delicate surfaces
- Lift-Away canister feature for versatile above-floor cleaning
- Anti-Allergen Complete Seal Technology with HEPA filtration
What We Don't
- Can be challenging to push on thick, plush carpets
- Smaller 0.9-quart dust cup requires more frequent emptying on larger jobs
- 25-foot cord limits reach in larger homes and open floor plans
Dyson Ball Animal 3 Extra
Severe mold situations and allergy sufferersPremium option for households with recurring mold or severe allergies. The whole-machine HEPA certification ensures zero spore escape during cleanup.
What We Like
- Whole-machine HEPA filtration traps 99.97% of particles
- Tangle-free turbine tool prevents hair wrap
- 290 AW suction power for deep cleaning
- Sealed system prevents allergen leakage
- Self-adjusting cleaner head for all floor types
What We Don't
- Premium pricing for a corded upright
- Small 0.45 gallon dustbin needs frequent emptying
- Heavy at 17.3 lbs for extended use
Frigidaire 50-Pint Dehumidifier
Post-cleanup drying and ongoing mold preventionCritical for mold prevention and drying after cleanup. The 50-pint capacity handles rooms up to 4,500 sq ft, perfect for whole-room carpet drying.
What We Like
- Removes 50 pints moisture daily
- Built-in pump for continuous drainage
- Washable filter reduces maintenance
- Custom humidity controls
What We Don't
- Requires emptying if not using pump
- Moderate noise level during operation
- Higher energy consumption running continuously in damp environments
Hathaspace Smart True HEPA Air Purifier
Airborne spore control during cleanupEssential during and after mold remediation to capture airborne spores. The medical-grade H13 filter removes particles as small as 0.1 microns, including mold spores.
What We Like
- 5-stage H13 HEPA filtration
- 1500 sq ft coverage
- Quiet operation
- Smart air quality sensor
What We Don't
- Replacement filters needed annually
- Unit runs continuously for best results
- Larger footprint than compact purifiers designed for single rooms
Sources & Research
Continue Reading
Explore more maintenance & floor care content or browse our other categories.
Frequently Asked Questions
- Is carpet mold dangerous?
- Yes, carpet mold poses health risks including respiratory symptoms, allergic reactions, and asthma attacks. According to the CDC, mold exposure can cause stuffy nose, sore throat, coughing, wheezing, burning eyes, or skin rash. People with asthma, allergies, or weakened immune systems face greater risks.
- Can I remove black mold from carpet myself?
- Do not attempt DIY removal of black mold (Stachybotrys chartarum). Black mold produces mycotoxins that require professional remediation with specialized containment and removal procedures. Contact certified mold remediation specialists for any suspected black mold.
- What kills mold in carpet permanently?
- No treatment kills mold permanently without addressing moisture sources. Anti-mold sprays, vinegar, and borax kill existing mold, but it will return if humidity stays above 50% or leaks continue. Permanent mold elimination requires moisture control plus initial remediation.
- Can moldy carpet be saved?
- Surface mold on carpet fibers can often be remediated if caught early (within 24-48 hours), the area is small (under 10 sq ft), and backing/padding remains dry. However, mold affecting backing, padding, or subfloor requires professional assessment and usually carpet replacement.
- How long does it take for mold to grow in wet carpet?
- Mold can begin growing in wet carpet within 24-48 hours under ideal conditions (temperatures 60-80°F with humidity above 60%). By 72 hours, visible mold colonies typically form. Immediate water extraction and drying within 24 hours prevents most mold growth.
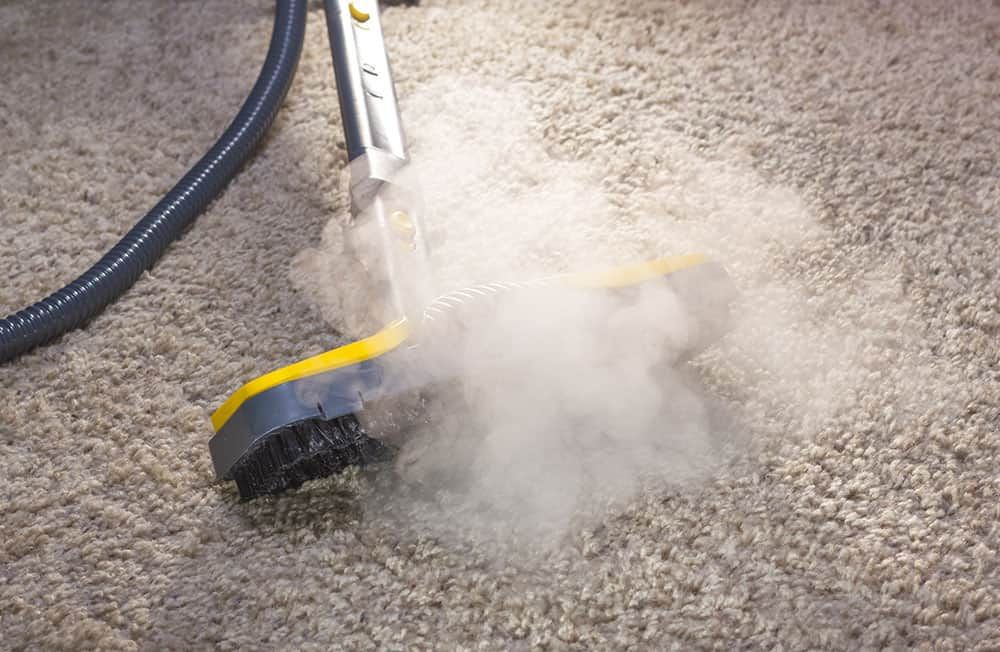
- Does steam cleaning kill mold in carpet?
- Steam cleaning temporarily kills surface mold through high heat (above 140°F), but it adds significant moisture to carpet that can worsen mold problems if not dried properly. For mold remediation, dry methods (HEPA vacuuming plus anti-mold treatments) are safer than steam cleaning. Reserve steam cleaning for maintenance after complete mold elimination and moisture control.
- Can carpet padding be dried and reused after mold exposure?
- No. Carpet padding is porous and retains moisture deeply within its structure. Once padding develops mold, it cannot be effectively cleaned or dried enough to prevent regrowth. Always replace padding when mold penetrates beyond carpet surface fibers. Attempting to save moldy padding leads to recurring mold problems within weeks.
- How do I know if mold in my carpet is making me sick?
- Common symptoms of mold exposure include increased allergy symptoms (sneezing, runny nose, itchy eyes), respiratory issues (coughing, wheezing, shortness of breath), headaches, or fatigue that improves when you leave the affected area. Keep a symptom diary noting when problems occur. If symptoms consistently appear in specific rooms or improve when away from home, mold may be the cause. Consult your doctor for proper evaluation, especially if you have asthma or immune system conditions.
Written By
Home Vacuum Zone
Our team researches, tests, and reviews vacuum cleaners to help you make confident buying decisions.
Related Articles
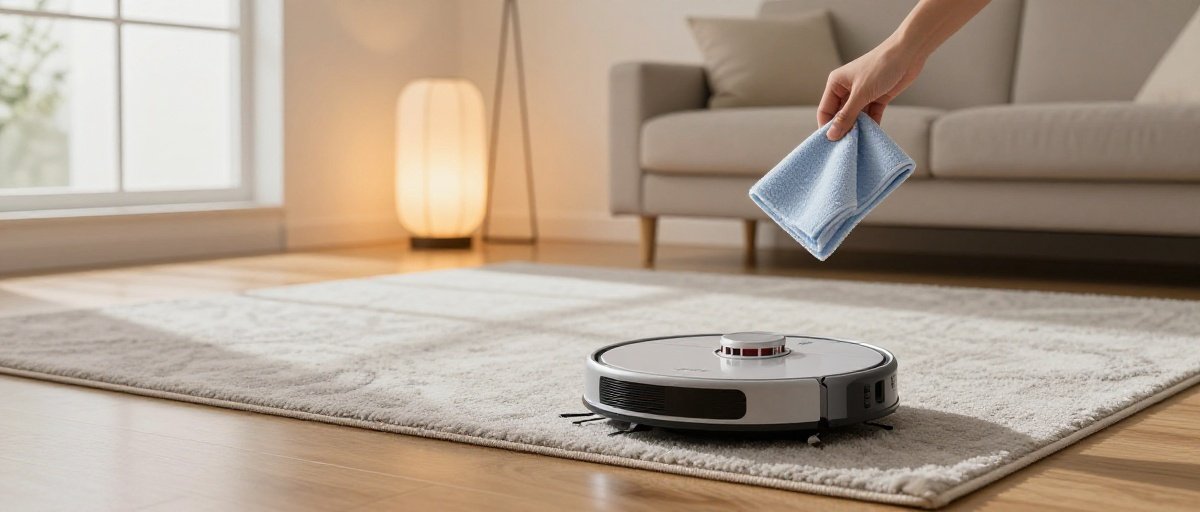
How to Clean and Maintain a Robot Vacuum: Complete Guide
Learn how to clean your robot vacuum properly. Step-by-step guide covers dustbin emptying, filter cleaning, brush roll maintenance, sensor care, and dock maintenance.
5 Best Steam Mops for Hardwood Floors (2026 Reviews)
Find the best steam mop for hardwood floors in 2026. Our top picks include safe, effective options from Bissell, Shark, and PurSteam with adjustable steam settings.
How Often Should You Vacuum? Complete Guide by Floor Type & Lifestyle
Learn exactly how often to vacuum based on your home's traffic, pets, allergies, and floor type. Get personalized recommendations and discover the best vacuums for your specific needs.